Social Media Login
The system is integrated with Facebook and Google+ to allow social media login for Customers. You have to configure your marketplace to use this feature.
Enale/Disale Social Login
The Admin has the ability to enable or disable Social Media Login for the marketplace from a centralized configuration panel. To do so, navigate to SETTINGS >> CONFIGURATIONS and locate the option as shown below:
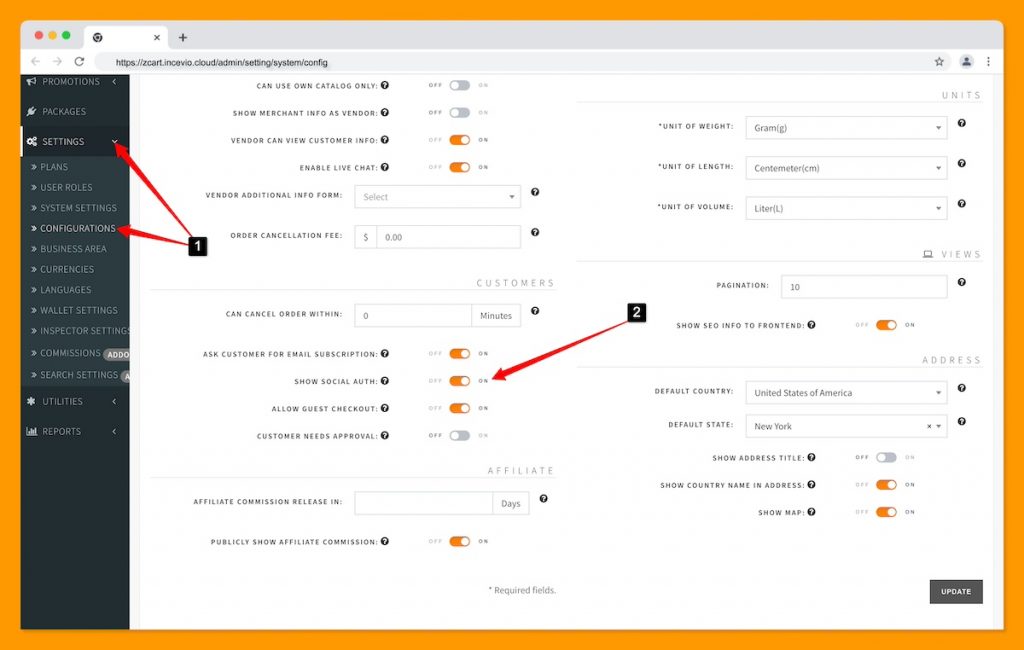
zCart Social Media Login
Facebook Login
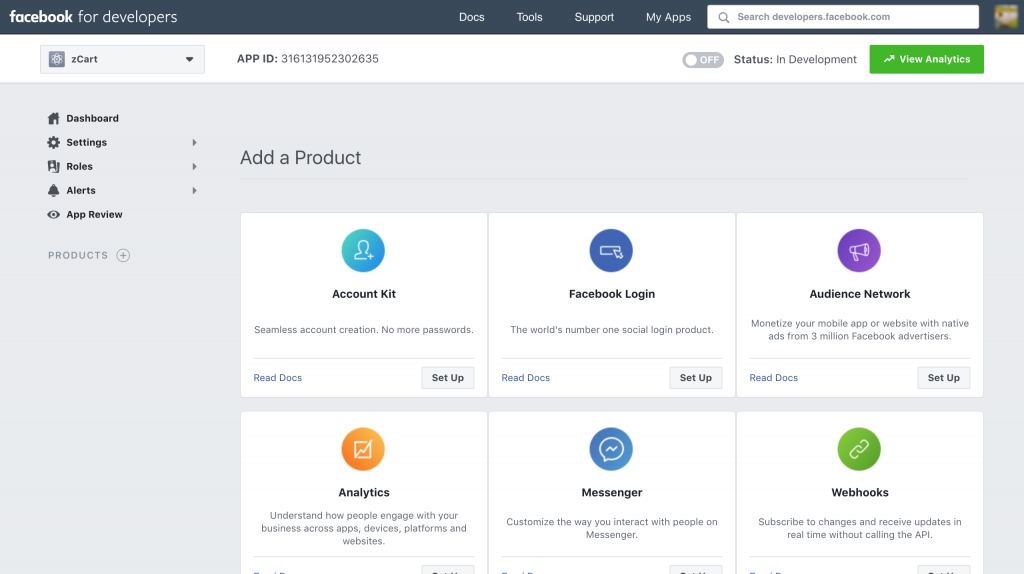
To configure Facebook login, go to the Facebook Developer site and create an app for your marketplace. Now login into your developer account Dashboard. From the list of products select Facebook Login and click the Set Up button.
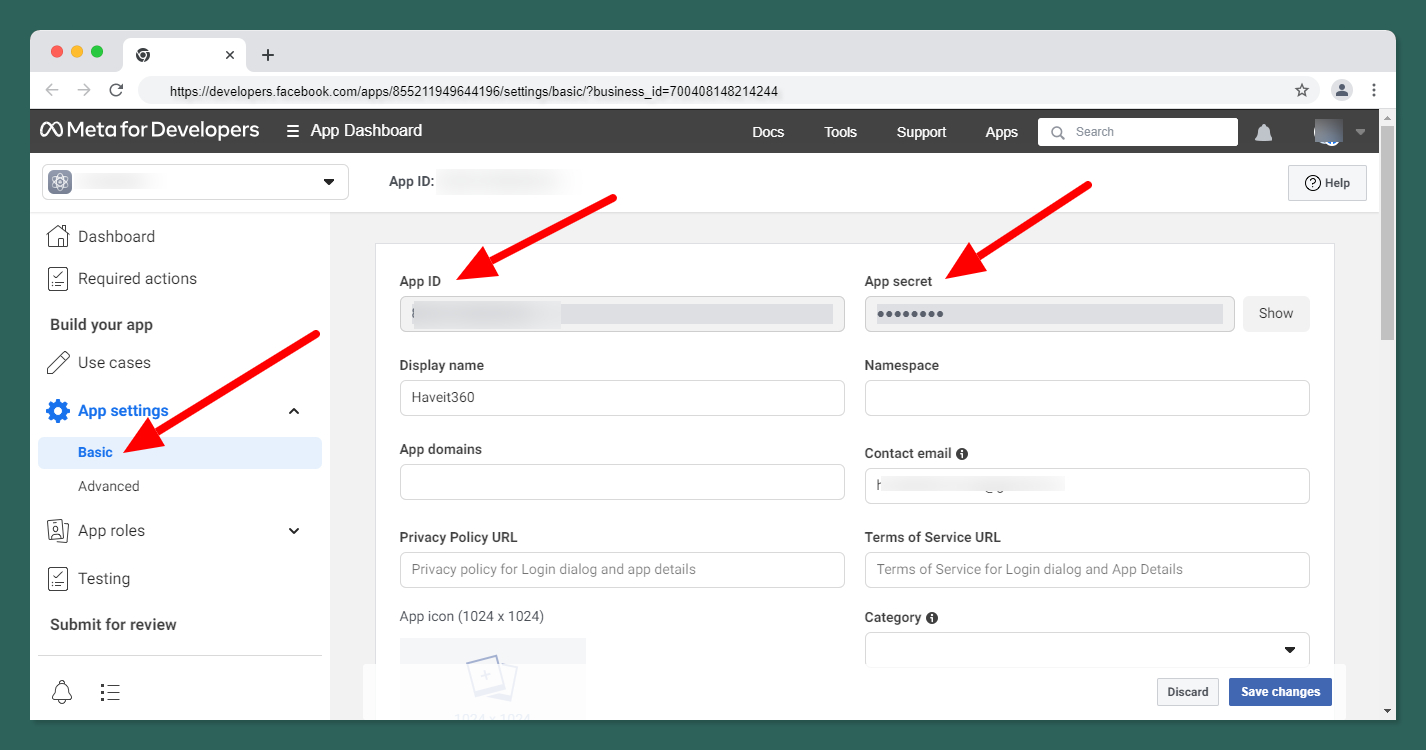
Go to the Settings > Basic sidebar. All the API credentials you need are here, get the App ID and App Secret. Fill out the form with your marketplace information and Save Changes. Below the same screen select Web and then on the coming screen just give the Site URL and click Save.
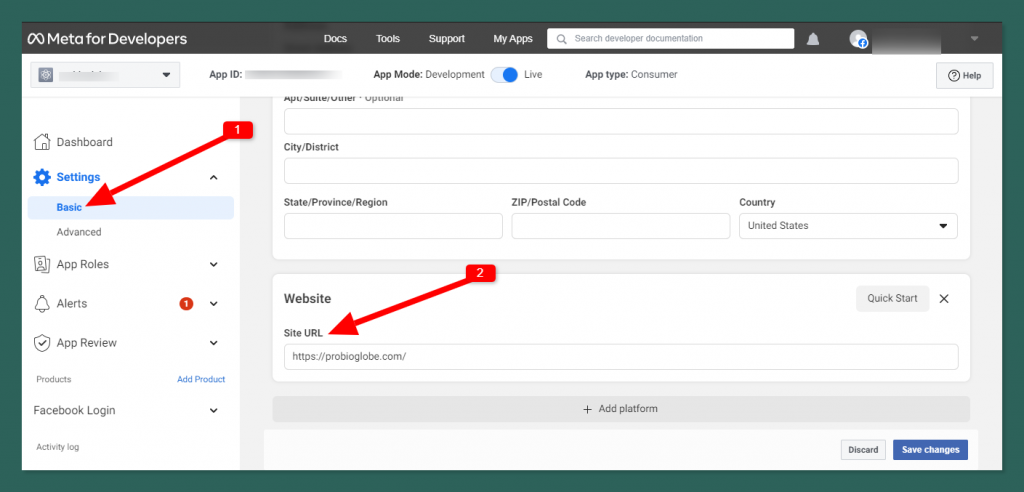
Now you need to do the verification from the same screen. For verification please follow this guideline.
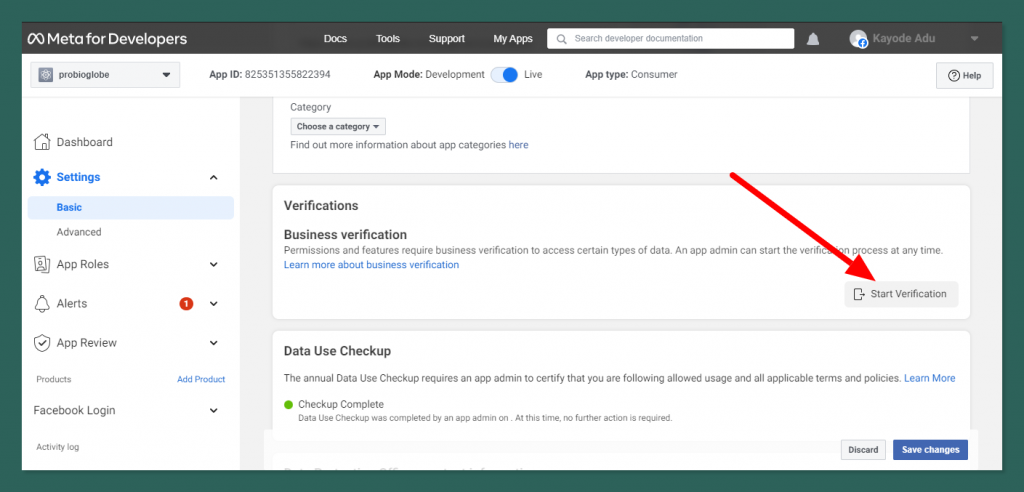
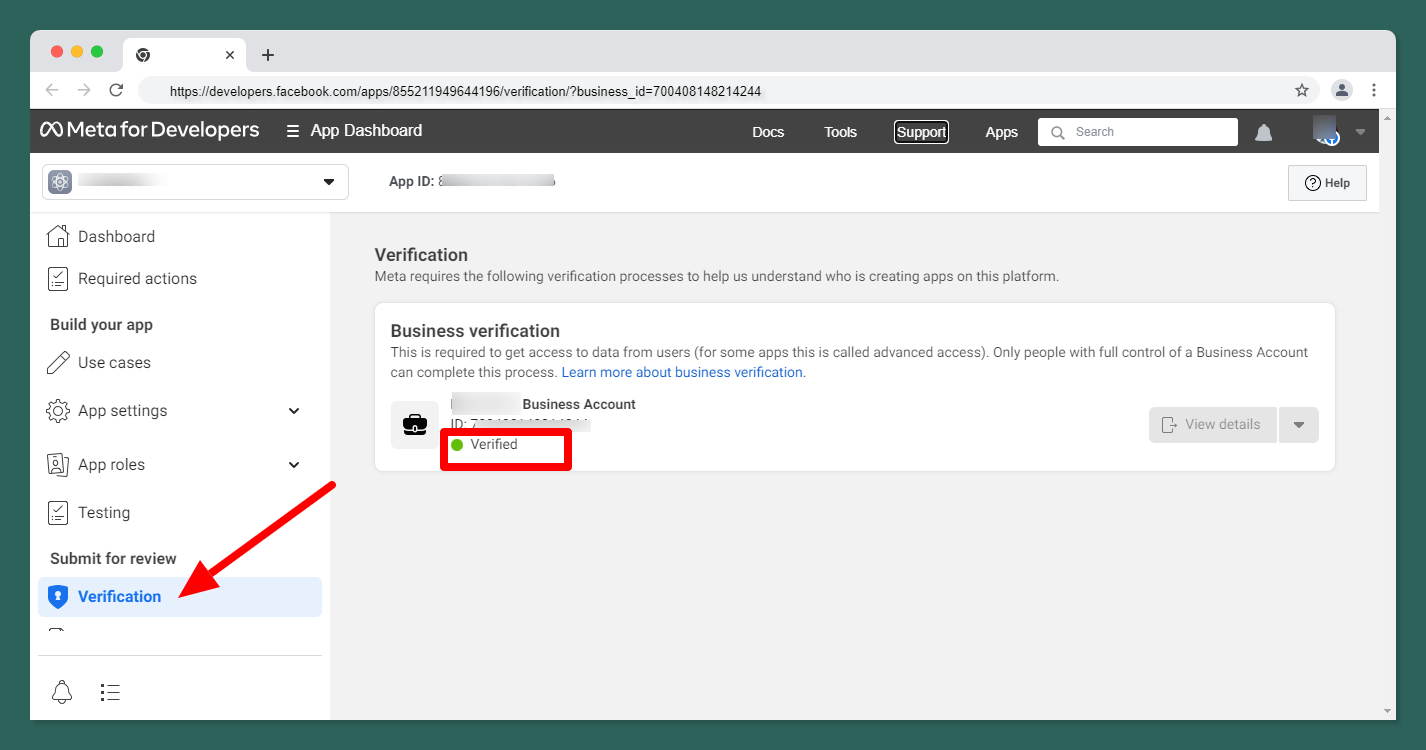
After verification you’ll get the verified tag.
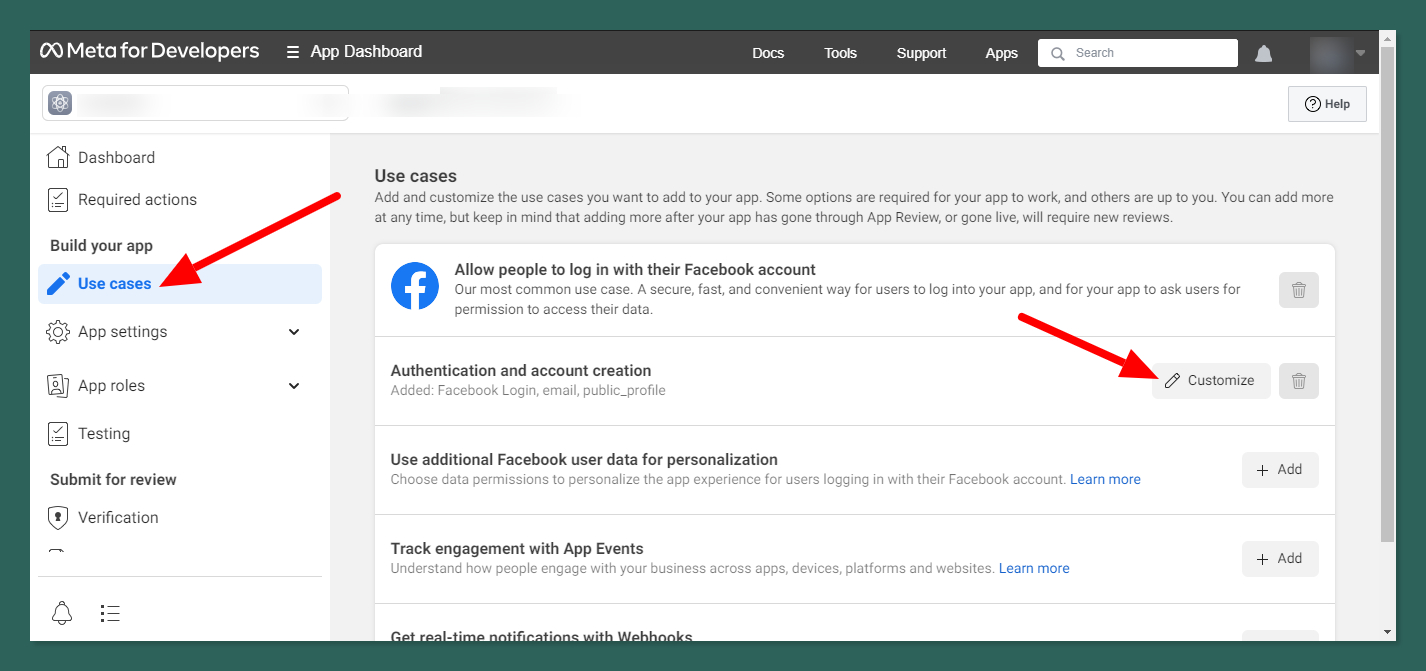
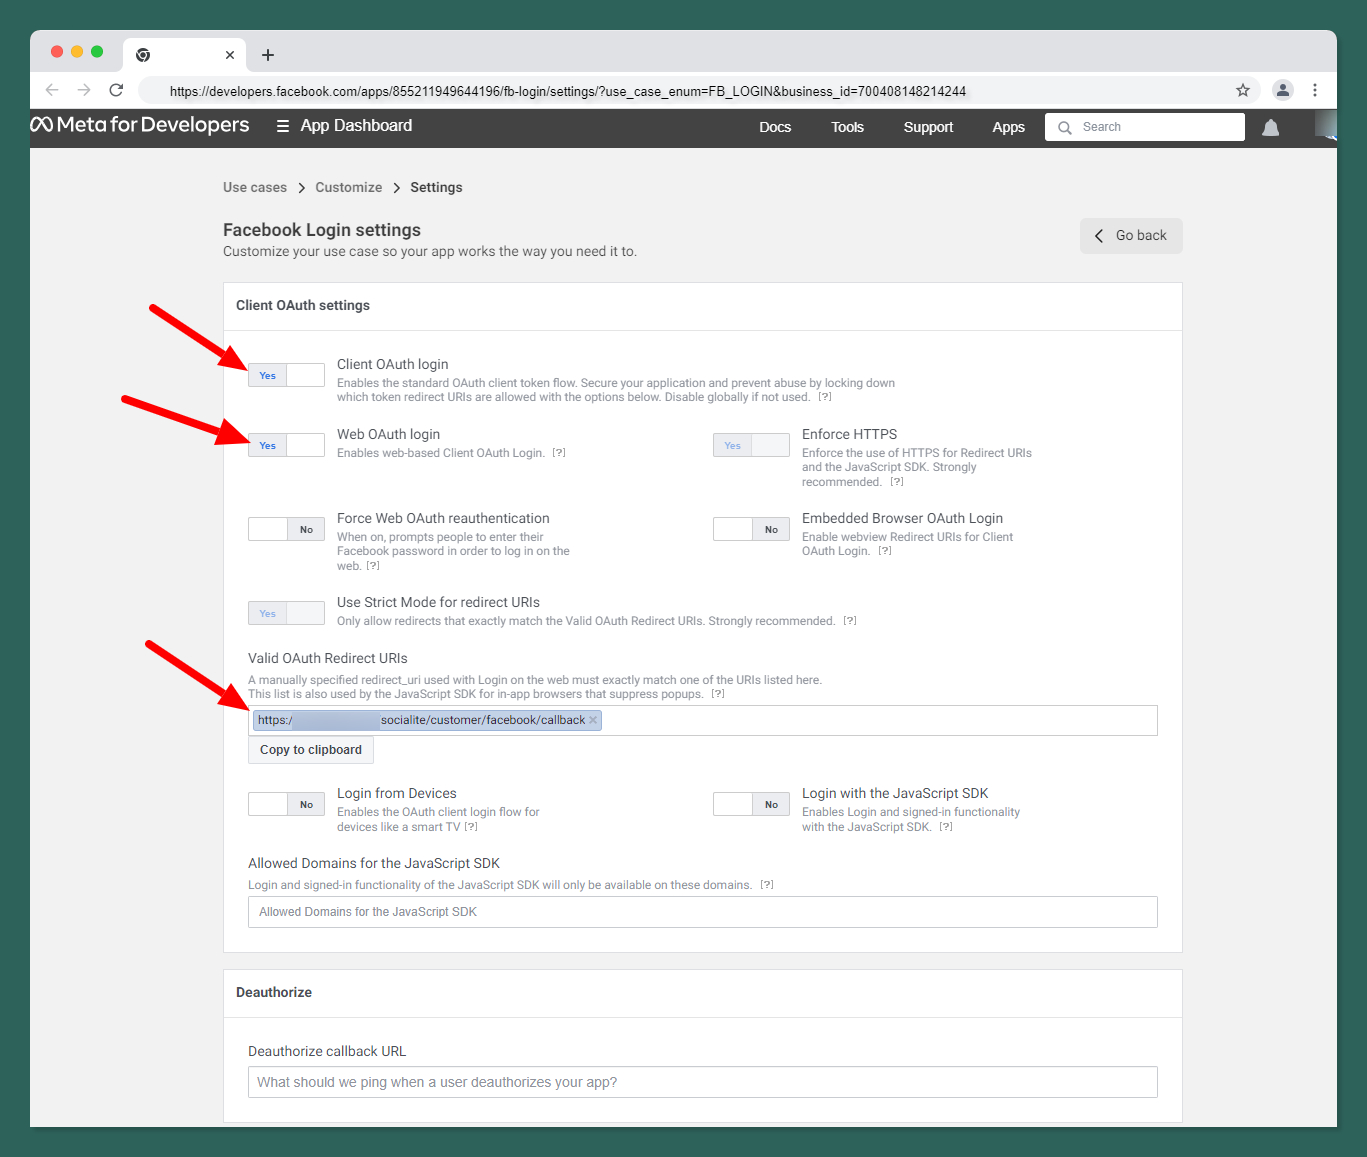
Now go to the Use Cases>>Customize>>Facebook Login>>Settings .
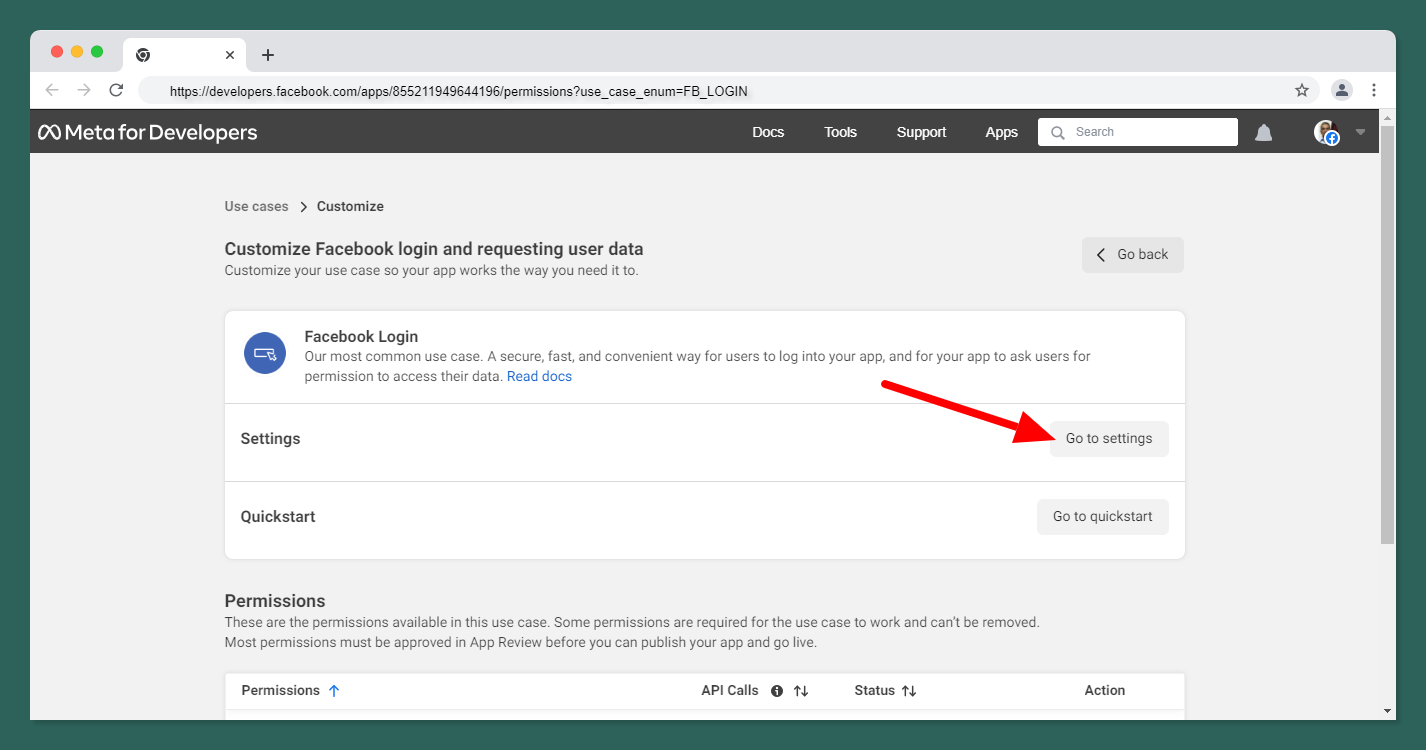
Enable Client OAuth Login and Web OAuth Login. After that give the callback URL like https://your_domain/socialite/customer/facebook/callback on the Valid OAuth Redirect URIs input field. Customers will be redirected to this URL after authentication. You can ignore the rest of the settings and click Save Changes.
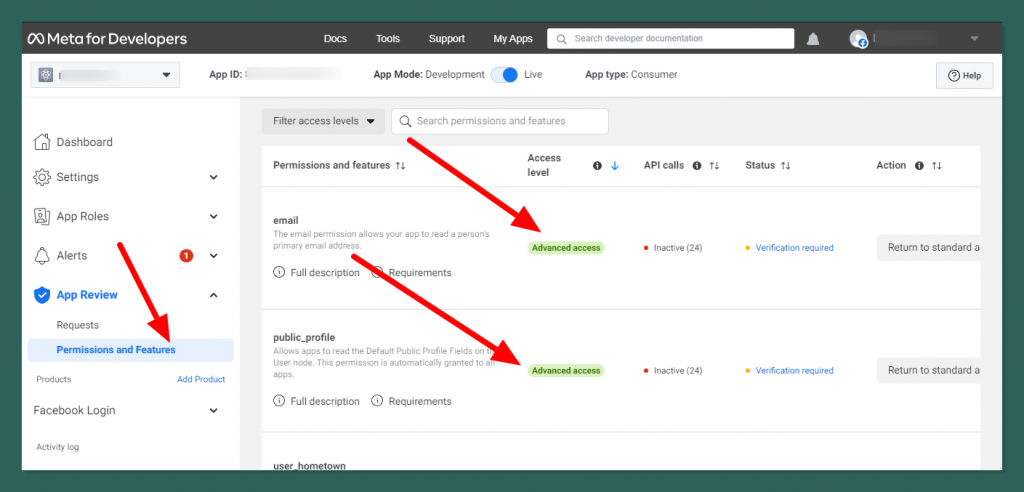
Then go to the App Reviews > Permissions & Features and make sure “email” & “public_profile” have active advanced-level access. Verification is required to activate this.
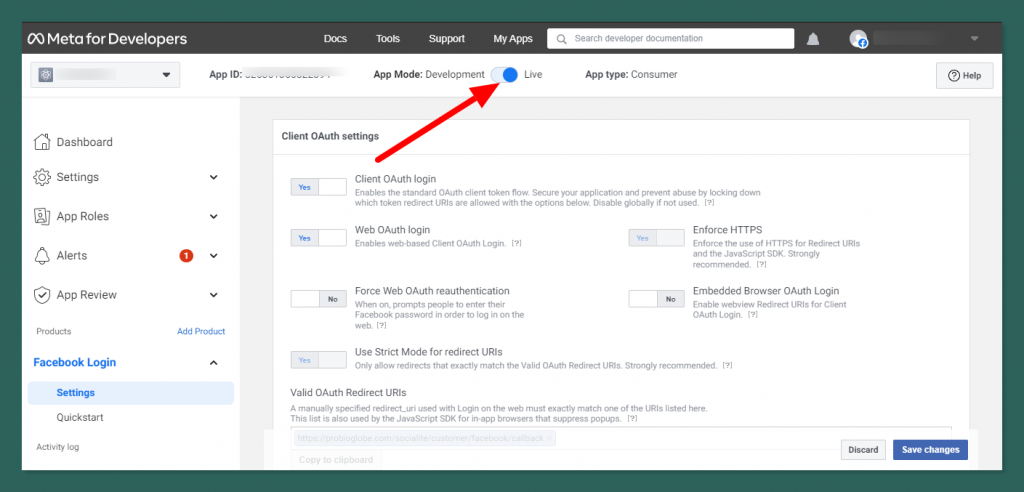
The last part of this section is to turn on the Facebook App to use it. You can do it from the top on the same screen.
To finish the integration open the .env file and update these keys with your values.
.
.
.
FB_CLIENT_ID=your_fb_client_id
FB_CLIENT_SECRET=your_fb_client_secret
.
.
.
Google+ Login
Like Facebook, you need to have a project at Google Developer account to get API credentials. If you already configured Google Analytics then you can use the same project. If you need help how to create a project on Google check here and come back this point. Head over to Google API’s site and Select your project. This time finds and enables Google+ API on the API list.
Now go to the Credentials in the sidebar. Click OAuth consent screen tab and fill out the details there.
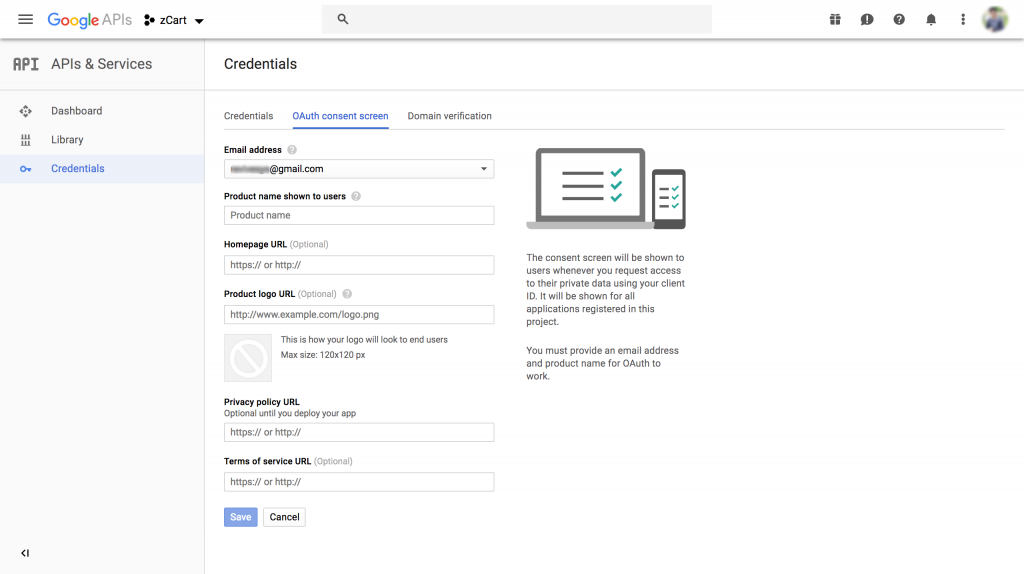
Now on the same screen go to the Credentials tab on the left. Click Create credentials and choose OAuth client ID from the dropdown list.
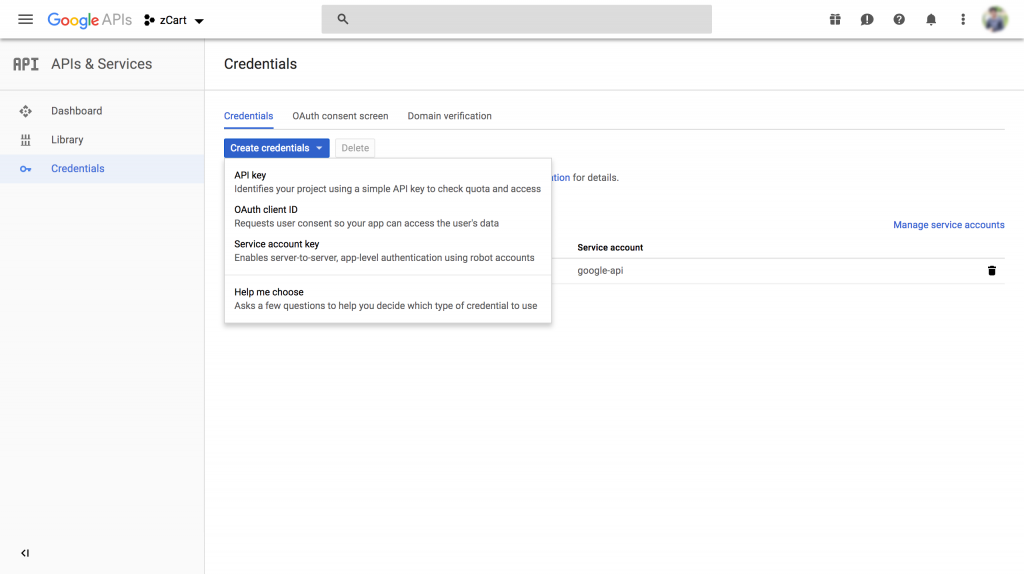
In the OAuth client ID screen, select the type of application, give origin and callback URLs like https://your_domain/socialite/customer/google/callback
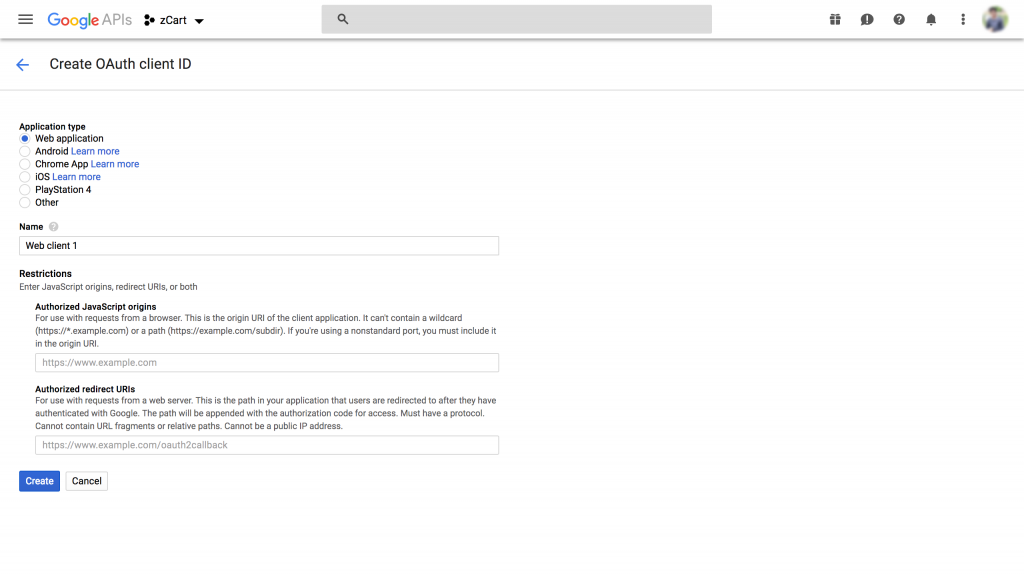
Get the Client ID and Client Secret in the credentials page. Now open the .env file and update these keys with your values.
.
.
.
GOOGLE_CLIENT_ID=your_project_client_id
GOOGLE_CLIENT_SECRET=your_project_client_secret
.
.
.
Social login configuration is done. Now customers will be able to login using Facebook and Google accounts.