Installation
The system has included a nice and easy installation wizard to help you to get ready quickly. Assumed that you’ve configured the server as required and ready to install zCart.
To run the installer visit www.your-domain.com (example: http://zcart.incevio.com), you’ll automatically be redirected to the installation page. If you don’t see the below screen your domain, then your server is not configured as required. Go back one step, Check the requirements first and make the system ready.
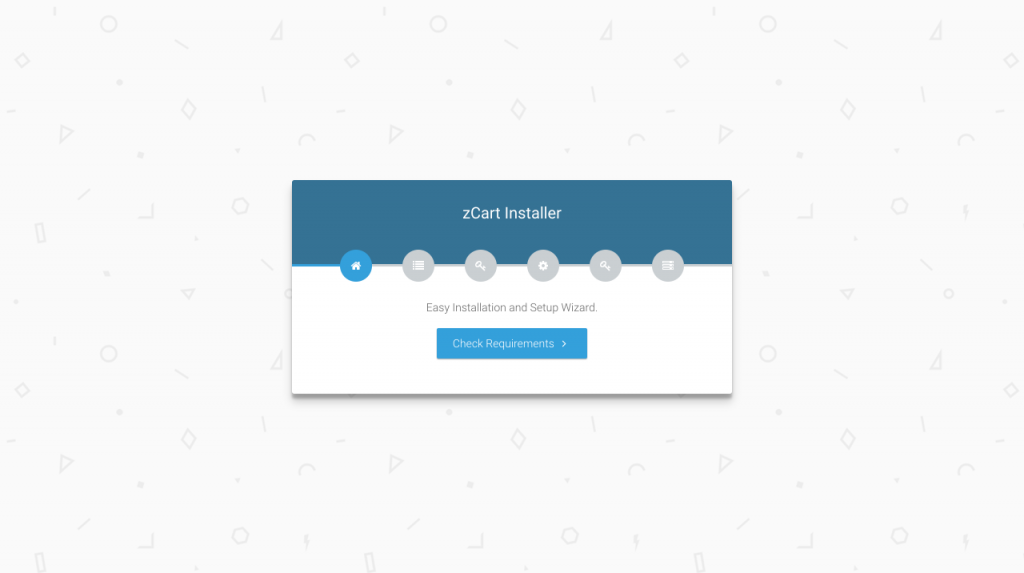
Click Check Requirements button to proceed.
Installer Check Requirements
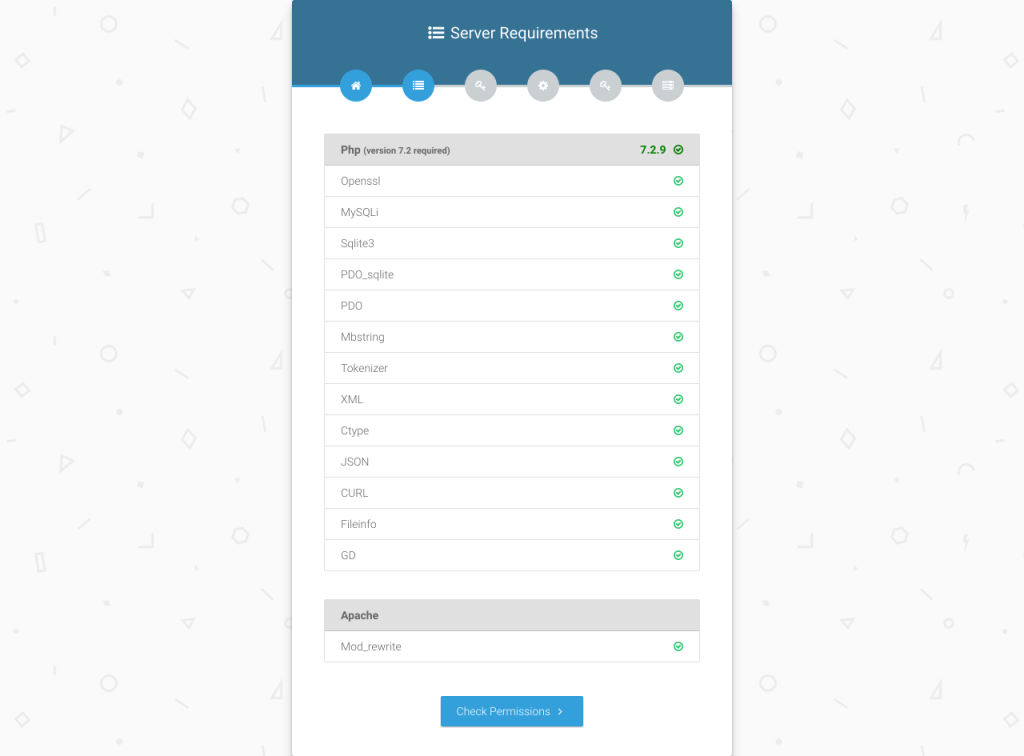
If your server has all the required modules and configurations you’ll see the Check Permissions button to proceed.
Server Requirements check permissions
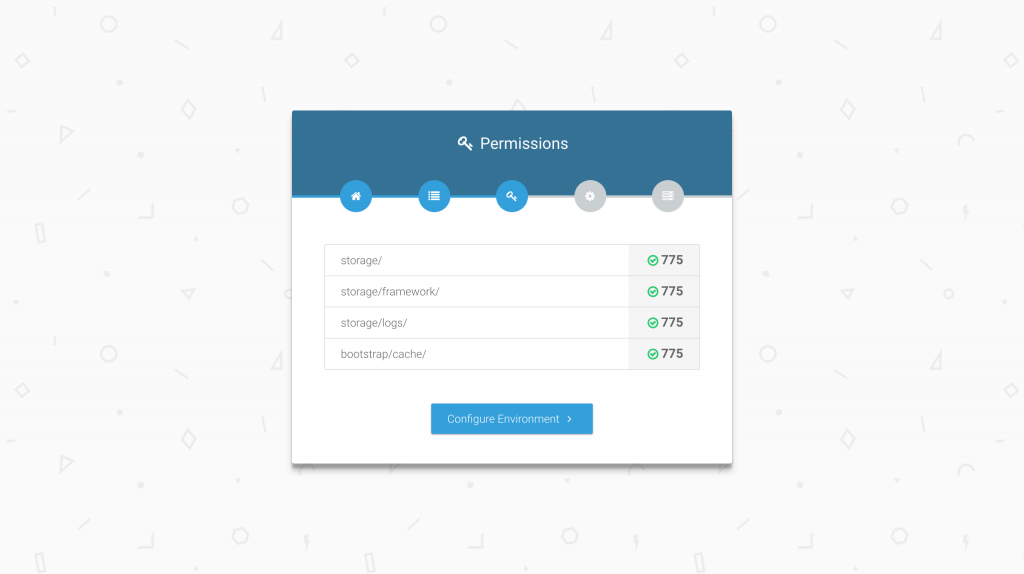
If all the required permissions are set, you’ll see the Configure Environment button to proceed.
Check Permissions Configure Environment
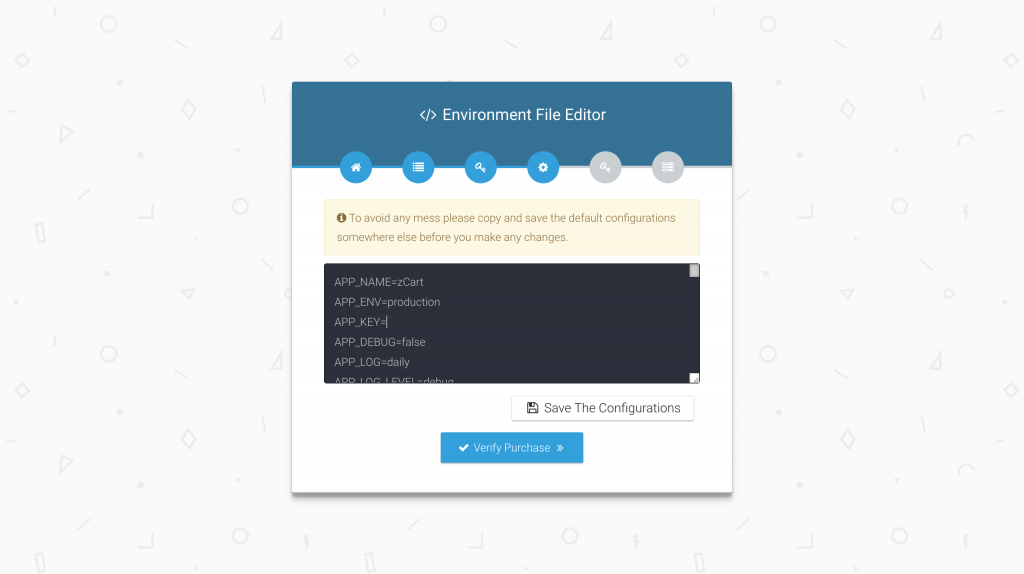
.env file. This the main configuration file and the system will break down if you do anything wrong here. Take a backup every time you want to make any modification.
Here you need to set all the important but sensitive configurations. Check the example.env file below. Right now you don’t have to fill all the values just fill these values for now:
APP_NAME: Your brand name.APP_URL: Your marketplace URL.DB_DATABASE: The name of the database you’ve created to install the application.DB_USERNAME: The database username. Don’t confuse this with your server username, database username is different.DB_PASSWORD: The password to access the database.
If possible, set the Mail configuration also in this section. Yes, you can configure it later. The Configuration section will guide you to set up the mail driver.
When you’re done click Save The Configurations button to save the .env file. A message will show up like: Your .env file settings have been saved. Now click Verify Purchase button to register your license.
Configure Environment Verify Purchase
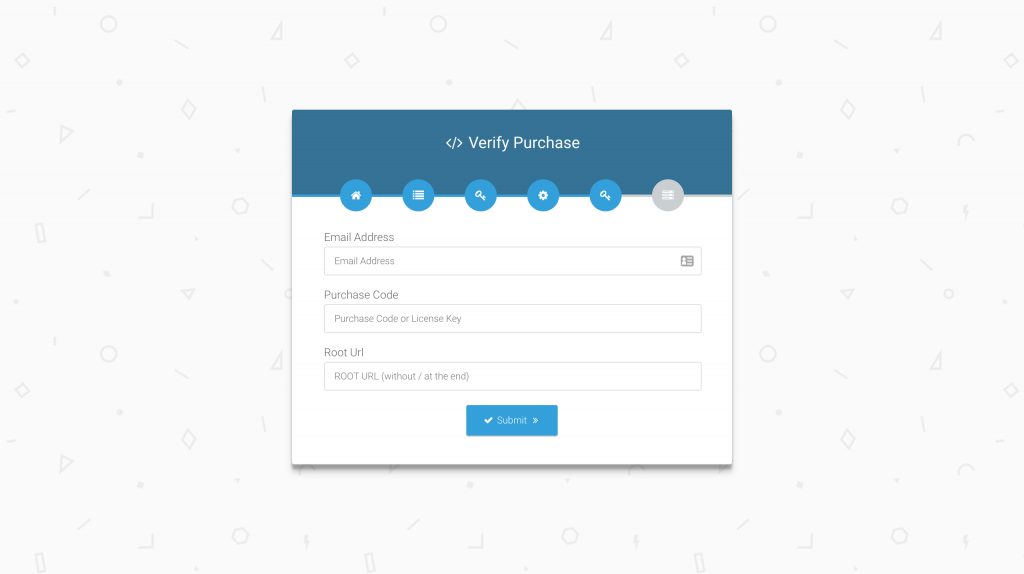
Enter your email address, purchase code/license code and your root URL of your marketplace. Fill the info and click the Submit button. Wait until you got some kind of confirmation.
Purchase Code, this article can help.
Verify Purchase Submit
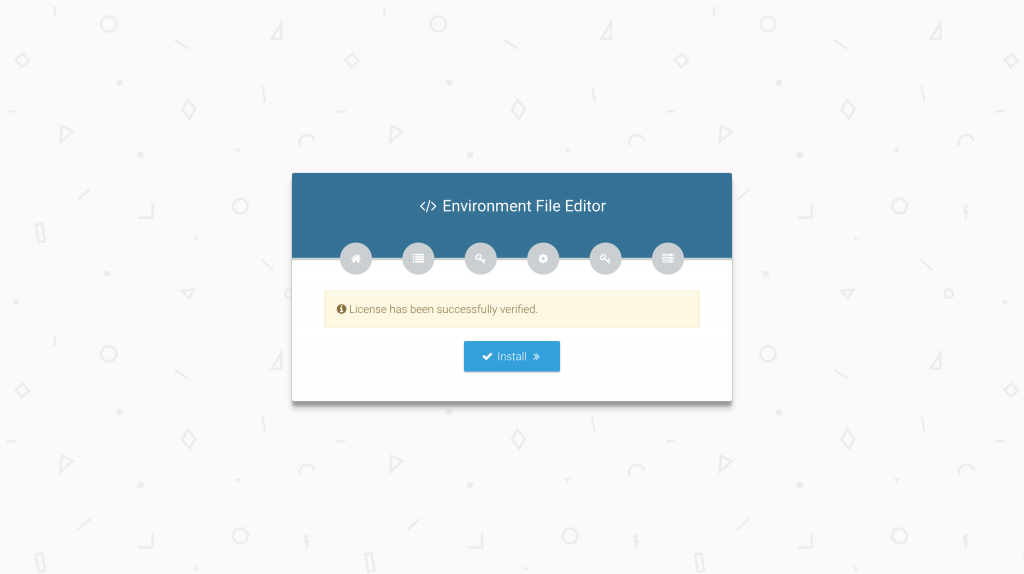
If the information is correct then a message will show up like: License has been successfully verified. Now click Install button to install the database and other configs.
It may take some time to complete the process. Wait until you got some kind of confirmation.
Verify Purchase Install
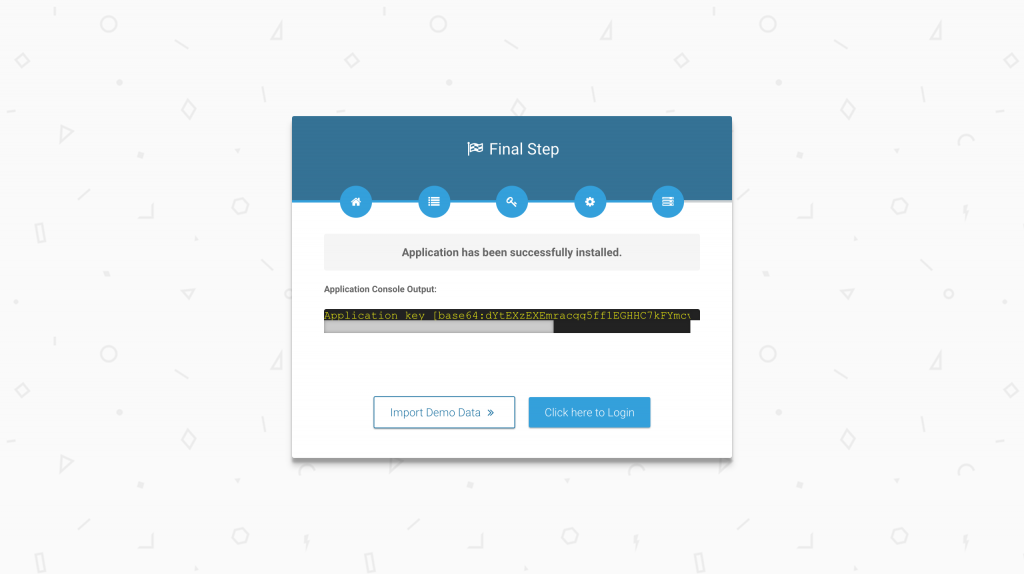
If everything went successfully you’ll see the Final Step sceen where you can login to your Dashboard.
The login information is the same as the demo site.
Username: superadmin@demo.com
Password: 123456
If you like start with some data instantly click the Import Demo Data button.
settings system settings envioronment config section of your super admin dashboard.
Get Installation Service Ask a Question
APP_NAME=zCart
APP_ENV=production
APP_KEY=
APP_DEBUG=false
APP_LOG=daily
APP_URL=https://example.com/

DB_CONNECTION=mysql
DB_HOST=127.0.0.1
DB_PORT=3306
DB_DATABASE=zcart
DB_USERNAME=
DB_PASSWORD=

MAIL_DRIVER=smtp
MAIL_HOST=smtp.mailtrap.io
MAIL_PORT=2525
MAIL_USERNAME=
MAIL_PASSWORD=
MAIL_ENCRYPTION=null

MAILCHIMP_APIKEY=
MAILCHIMP_LIST_ID=

FB_CLIENT_ID=
FB_CLIENT_SECRET=
FB_REDIRECT_URL=https://example.com/customer/login/facebook/callback

GOOGLE_CLIENT_ID=
GOOGLE_CLIENT_SECRET=
GOOGLE_REDIRECT_URL=https://example.com/customer/login/google/callback

STRIPE_KEY=
STRIPE_SECRET=
STRIPE_CLIENT_ID=

SCOUT_DRIVER=tntsearch
SCOUT_QUEUE=false

ANALYTICS_VIEW_ID=