Build and Release iOS App
Now it’s time to set up the iOS build and then run it in the simulator to test.
- Add the package name build identifier [Important]
Use the same method as the android – [Add the package name (build identifier) [Very Important] (android)]
- Update app version:
Use the same method as the android – [Update app version (android)]
- Firebase Setup:
First of all, create a project in the Firebase console named your app.
- Go to https://console.firebase.google.com/
- Create an iOS project.
If you already have one, just open the console with that project.
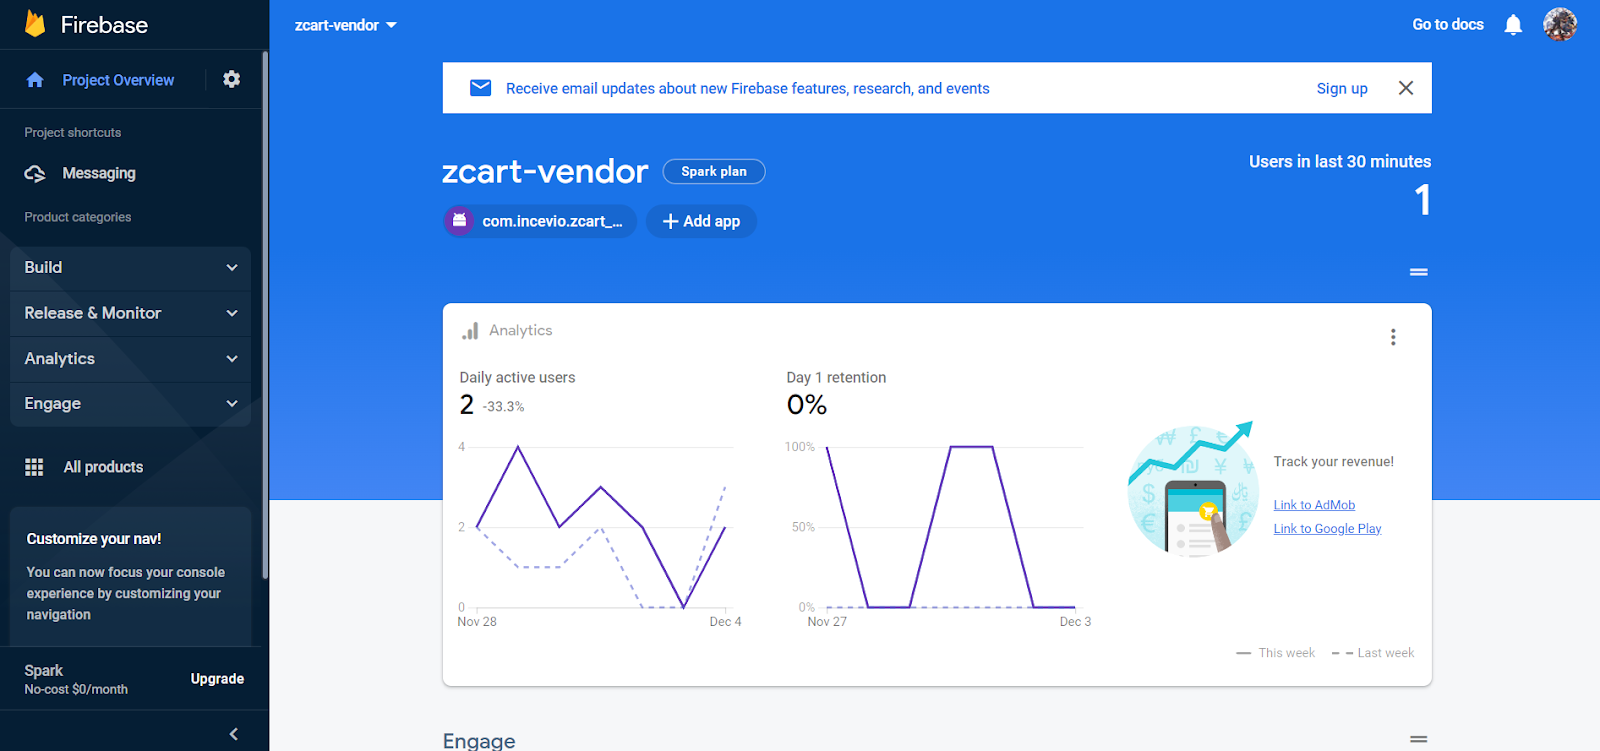
- When your project is created, you will see your dashboard like this.
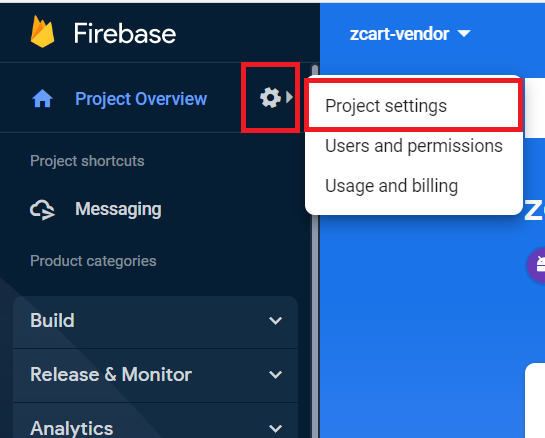
- Tap the settings button in the left corner. A pop-up menu will appear. Click on ‘Project settings’ from the pop-up menu. The settings page will open.
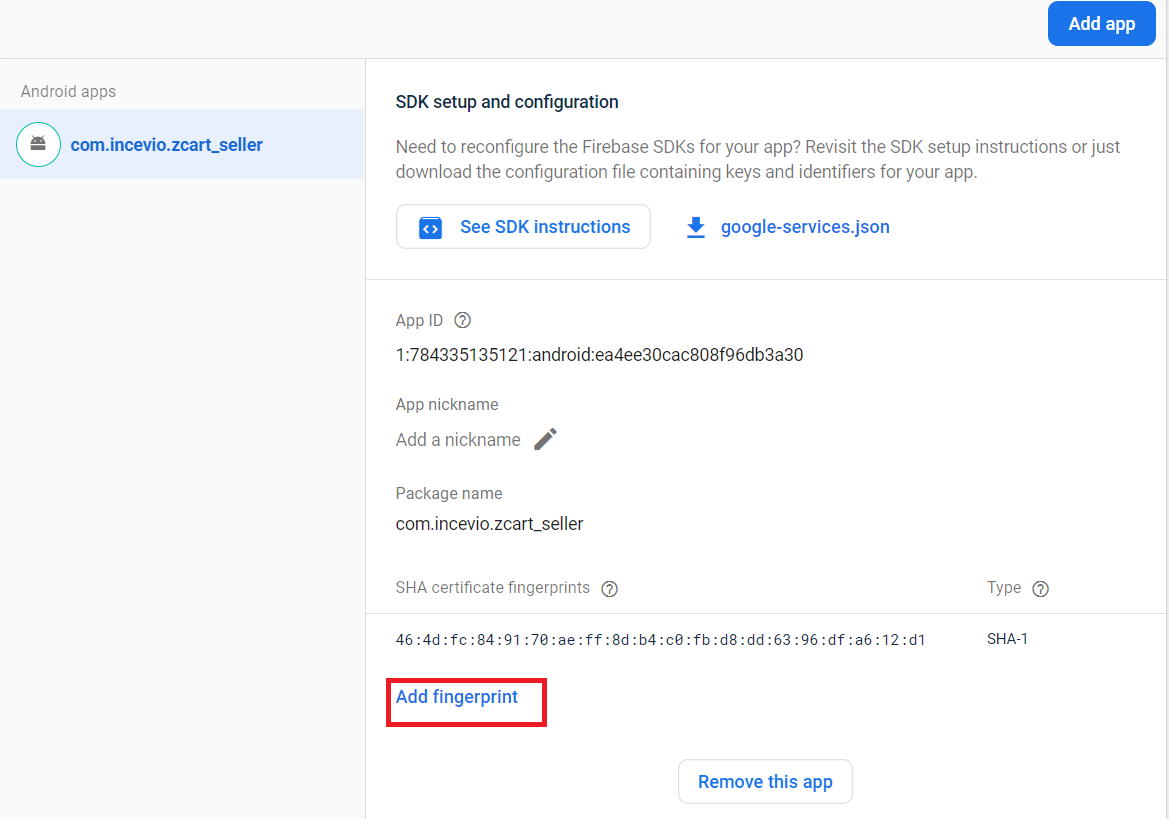
- Scrolling down you will find ‘SDK setup and configuration’. Click on ‘Add fingerprint’ to add the SHA key
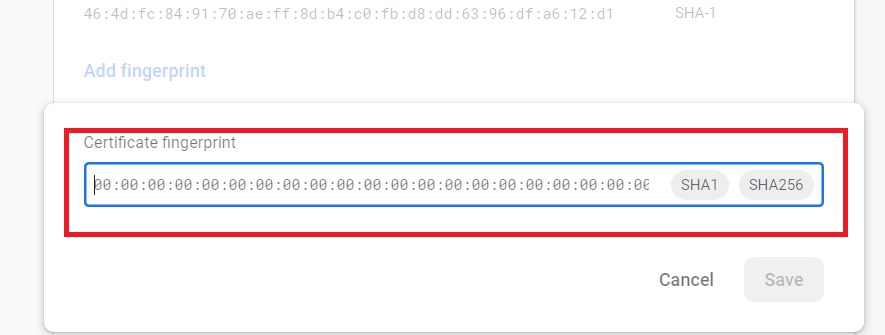
So for the first one, let’s find out your debug fingerprint.
Generate SHA-1 for Flutter/React-Native/Android-Native app from this link, You will find a lot of ways to find the debug SHA-1 fingerprint. With this debug fingerprint, you can test your app in the debug mode.
- Time to run the app in the simulator:
All the configuration has been made. Now it’s time to run your app in the emulator.
- Signing, Building APK or AppBundle, and releasing the android app:
For this step, you have to follow the default steps from the flutter team.
Browse Build and release an iOS app. Follow all the steps here except the ones you already did.
After completing all the steps above you are finished building the app for iOS!