Stripe Connect API
Stripe Connect enables you to control credit card payments on behalf of the merchant’s connected accounts. By configuring Stripe Connect API you can perform the common task of processing payments on a seller’s behalf. You’ll need CLIENT ID, SECRET KEY, PUBLISHABLE KEY ACCOUNT ID and WEBHOOK SECRET from Stripe.
Register Your Platform
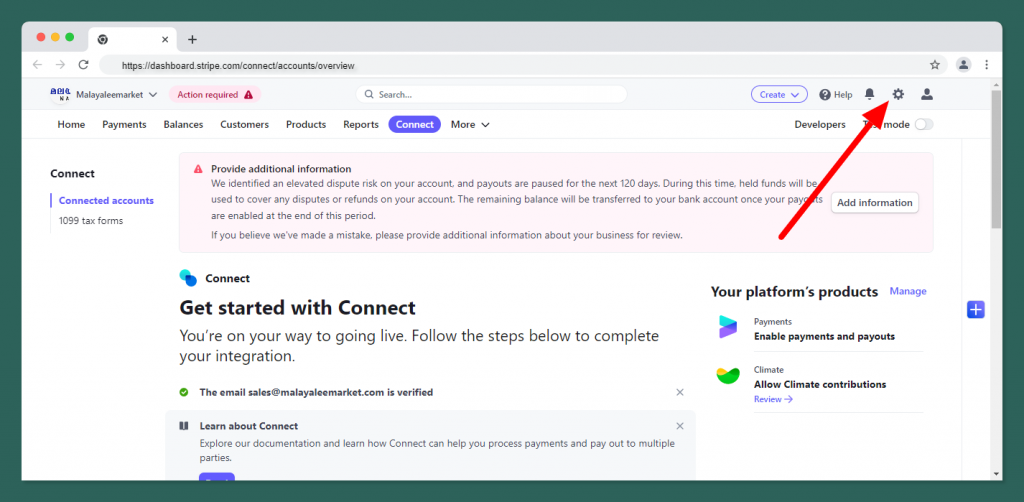
Very first you have to register your marketplace platform with Stripe. Login into your Stripe dashboard and go to the Settings option.
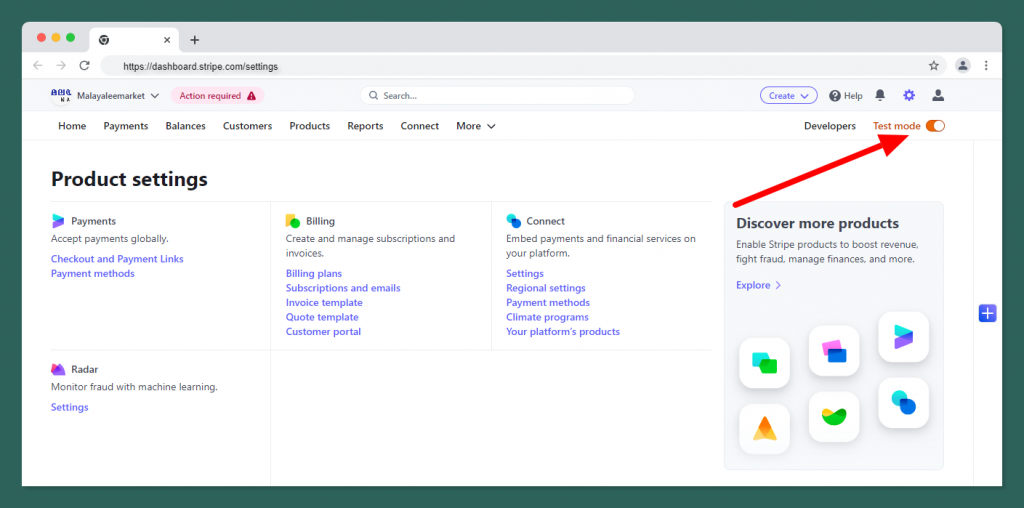
If you want to get test mode credentilas then please turn on the Test mode button. And if you want to get live mode credentilas then please skip this step.
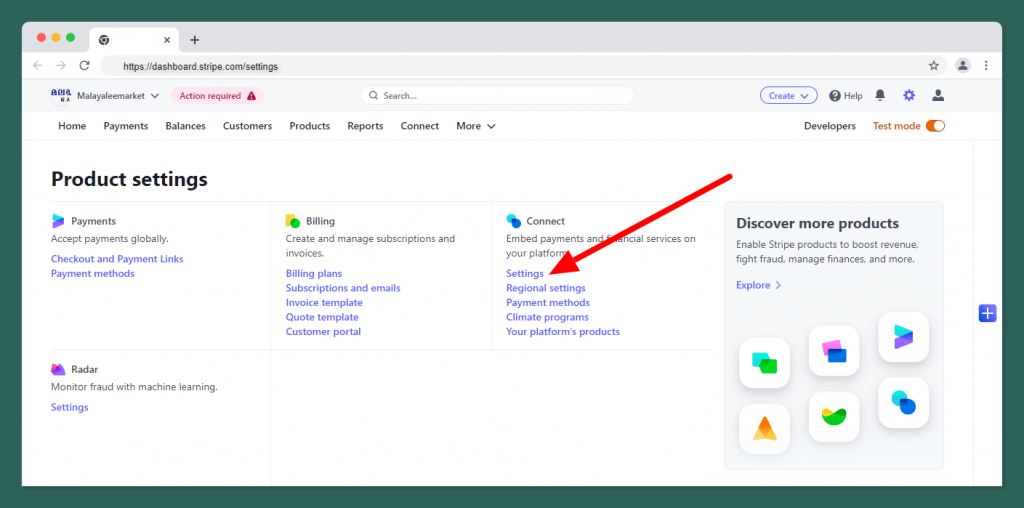
Then click the “settings” option under “connect”
On the next screen scroll below, in the Integration section you’ll get the client ID, we’ll need this ID later in this guide. Enable the OAuth settings based on your account type, If you’re confused then enable both. Now click Add URI button and give https://your_domain/admin/setting/stripe/redirect in the Redirect URI field.
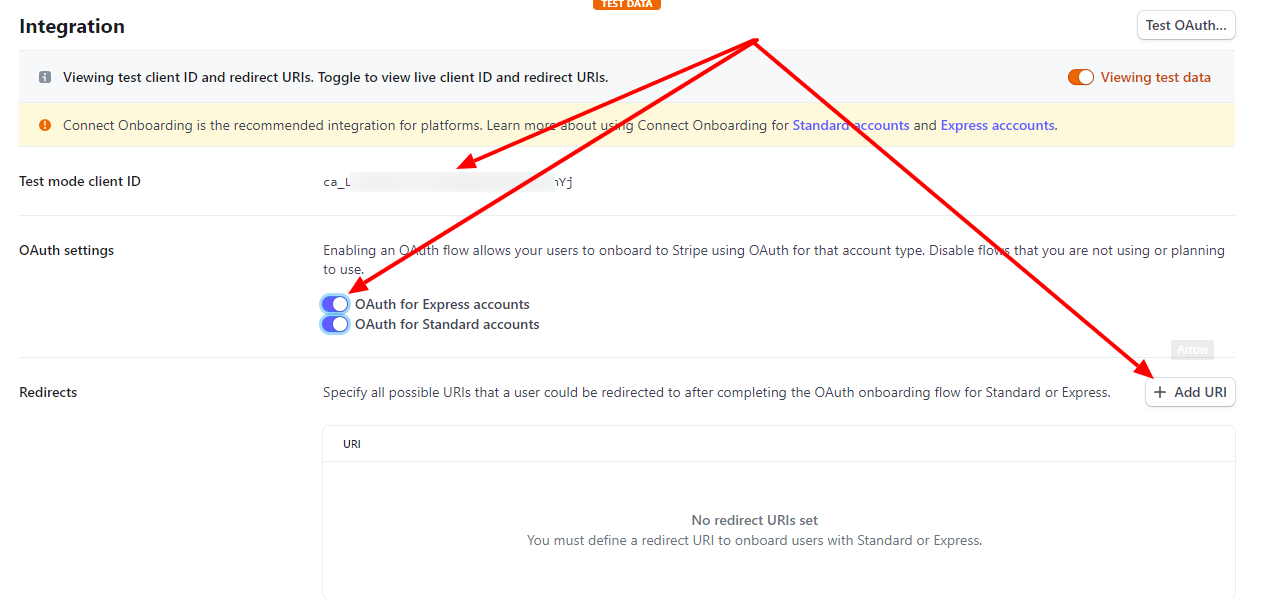
Stripe connect settings
On the same screen scroll to Branding section and fill the form with your brand information, upload the logo, and icon.

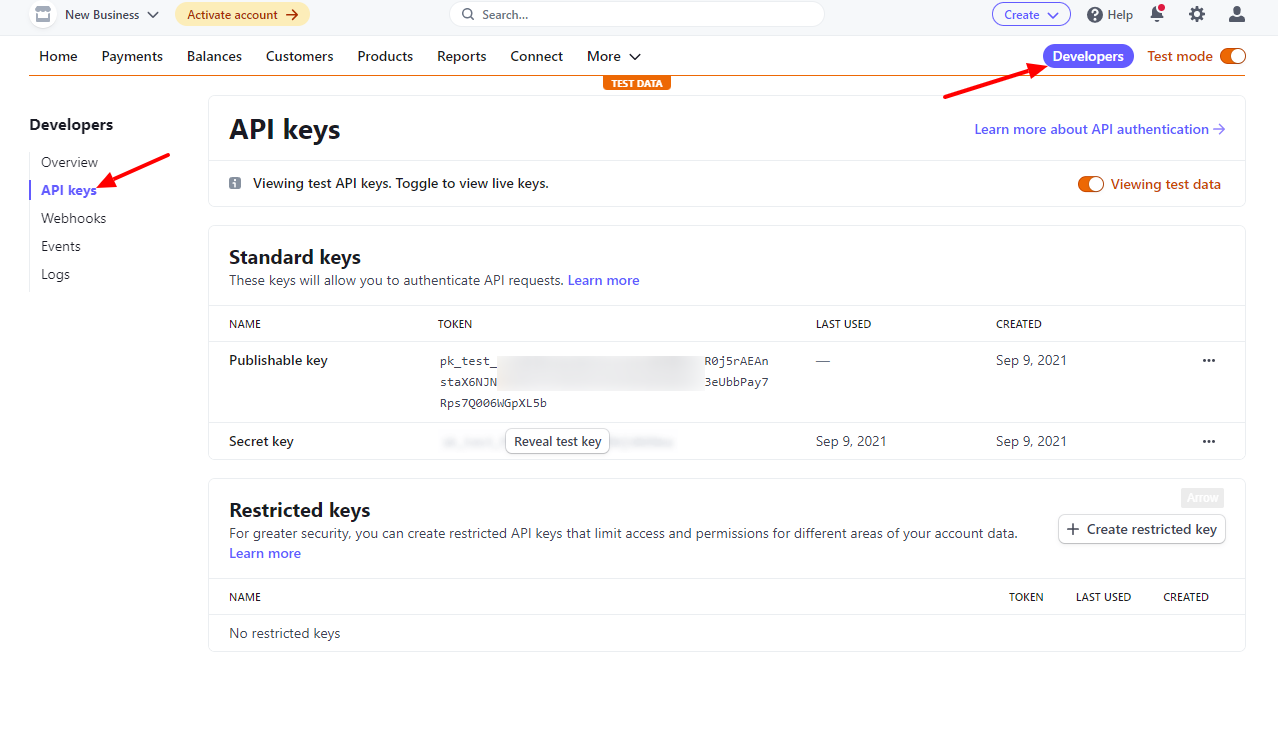
Get API credentials
Next, go to Developers from the topbar and then API keys section from the sidebar and get the Publishable key and Secret key.
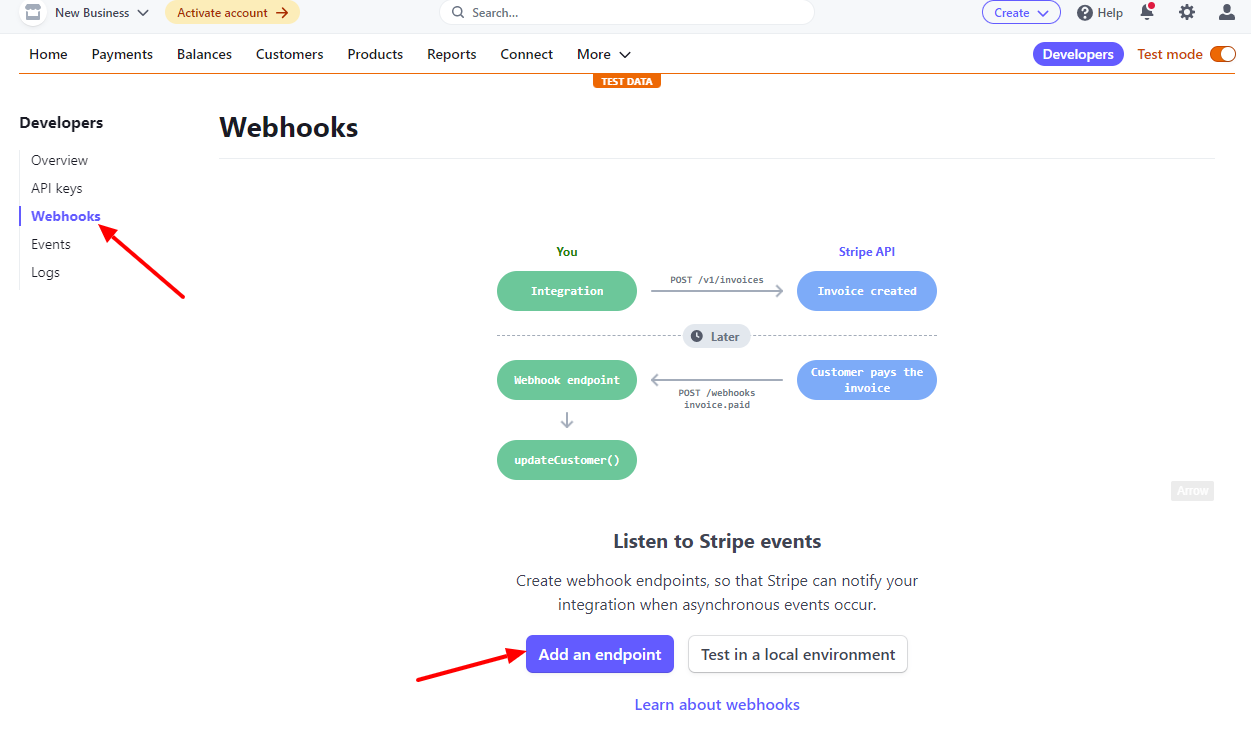
Handling Stripe Webhooks
One more thing is remaining to finish configuring the Stripe side. And that is webhooks. By setting webhooks we allow Stripe to communicate with your platform when any changes happen on Stripe’s site like subscription updates, cancellations, payment failures, etc. so that your marketplace can take action to manage the vendor account on your marketplace. zCart has everything configured for you, now you just have to set the URL and the secret key for secure communications.
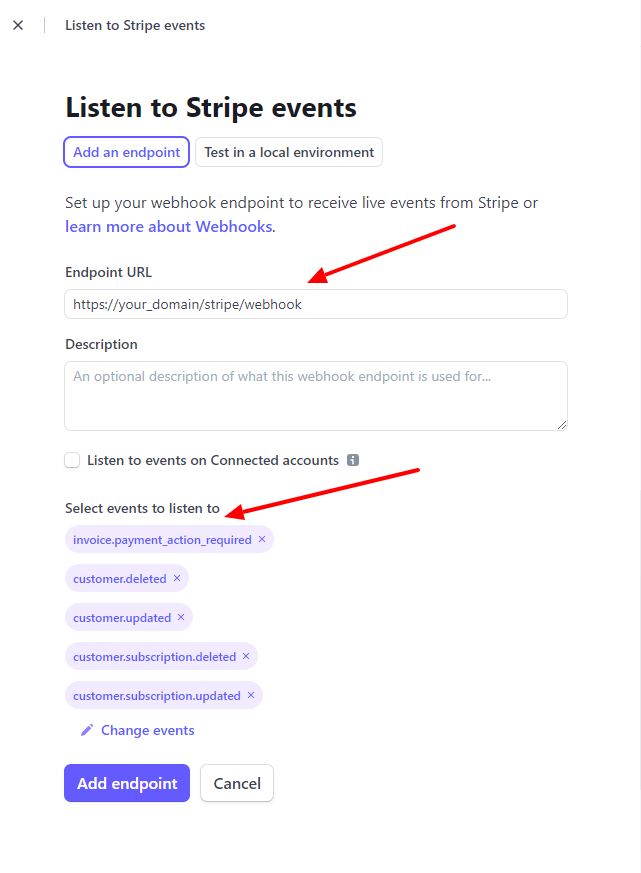
Go to the Developers Webhooks section from the sidebar and click the Add endpoint button. On the next window enter https://your_domain/stripe/webhook in the Endpoint URI field and add the below events to the Events to send section.
 Stripe Webhooks Events
Events need to enabled
- customer.subscription.updated
- customer.subscription.deleted
- customer.updated
- customer.deleted
- invoice.payment_action_required
After adding the webhook endpoint URL and events. Click on Webhooks and get Signing secret value to secure communication.
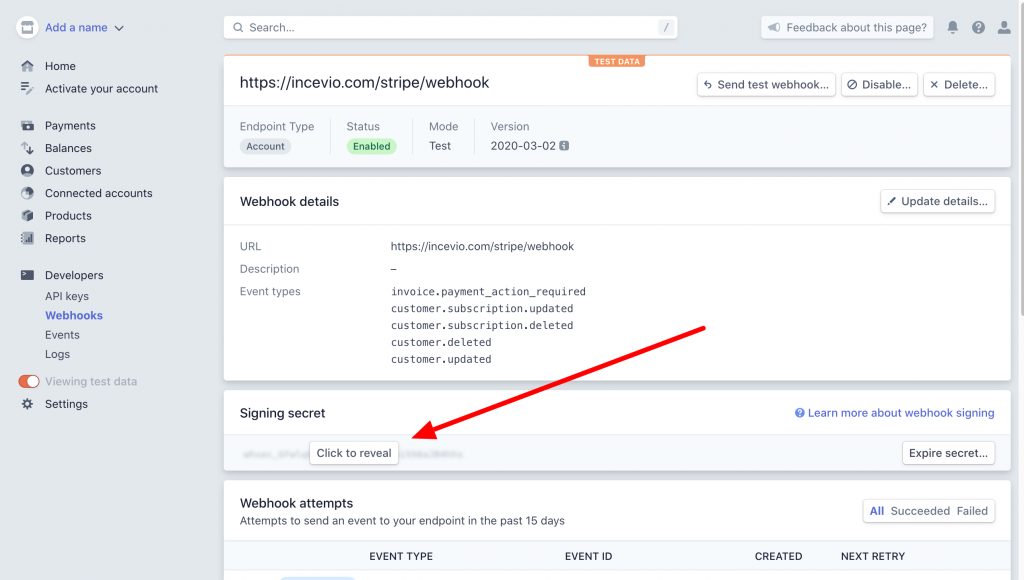
Stripe webhooks secret
You have done Stripe connect API configurations, please open the .env file and update these keys with your values.
.
.
.
STRIPE_KEY=your_stripe_publishable_key
STRIPE_SECRET=your_stripe_secret_key
STRIPE_CLIENT_ID=your_stripe_client_id
STRIPE_WEBHOOK_SECRET=stripe_webhook_signing_secret
.
.
.
From now the application will automatically handle canceling subscriptions that have too many failed charges (as defined by your Stripe settings), customer updates, customer deletions, subscription updates, and credit card changes.
Now your marketplace can use Stripe APIs to manage payments. But still, we’re not done. You need to create subscriptions and prices on the Stripe dashboard and also in your marketplace dashboard to charge vendors. Please check this section of the documentation for help.
View test data to get test credentials on the Stripe dashboard.
Now from your platform’s admin Dashboard navigate to settings configuration payment method tab and enable Stripe payment method so that your marketplace vendors can accept credit card payments.