First of all create a project in google console named your app.
- Go to https://console.cloud.google.com.
- Create a project.
If you already have one, just open the console with that project.
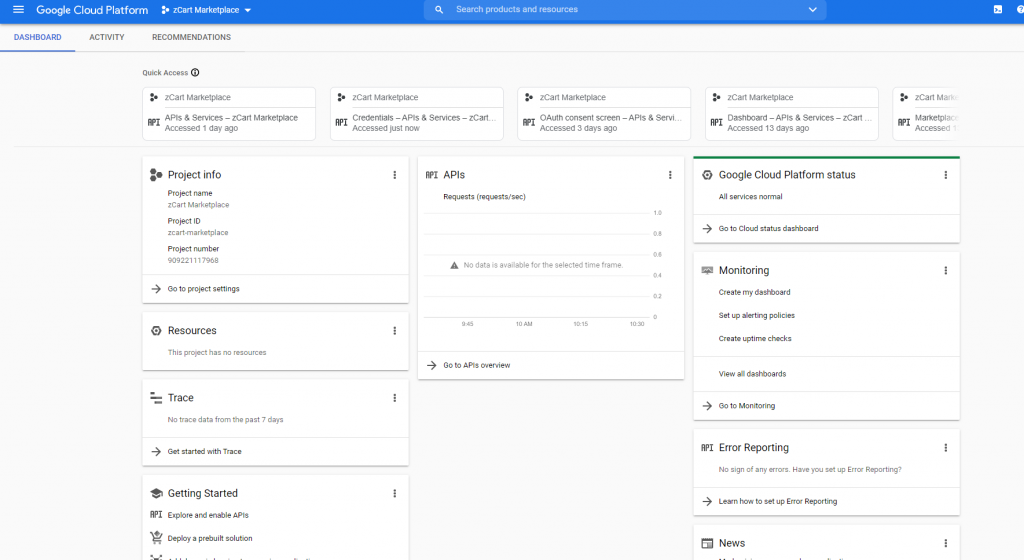
- When your project is created, you will see your dashboard like this.
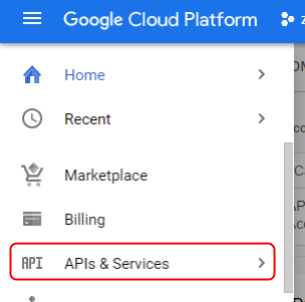
- Tap to the menu button in the left corner and a menu drawer will be opened. Select APIs & Services. A new page will open.
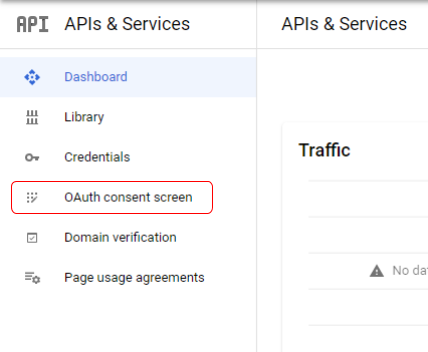
- Click the OAuth consent screen. It will take you a new page and this button will be selected.
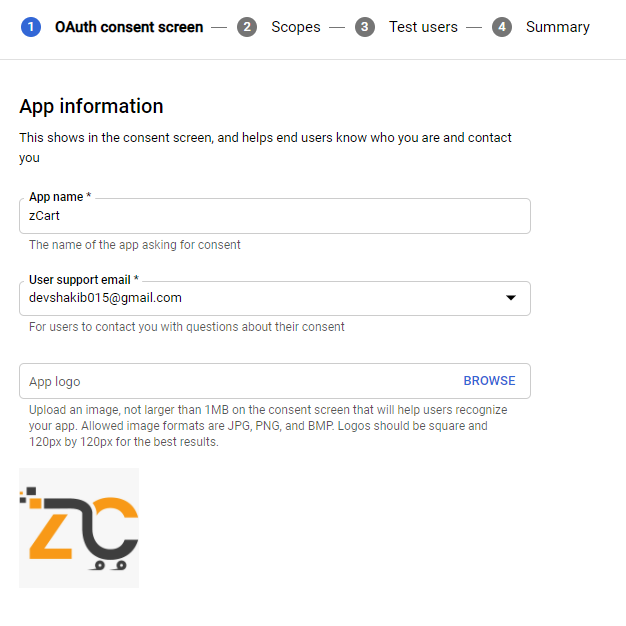
- Insert the required information and finish all the steps to create an app.
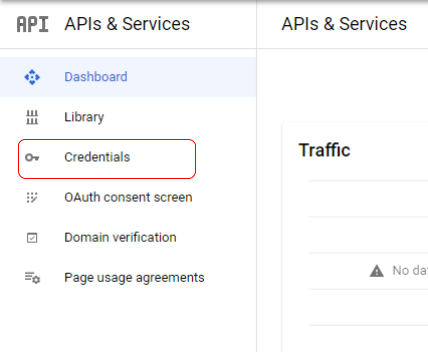
- After creating your app, Go to credentials from the menu bar.
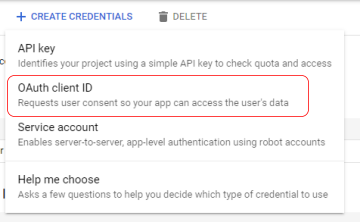
- Select OAuth Client ID
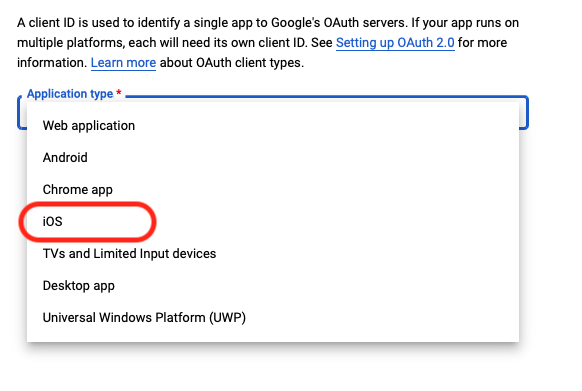
- Select iOS as an application type.
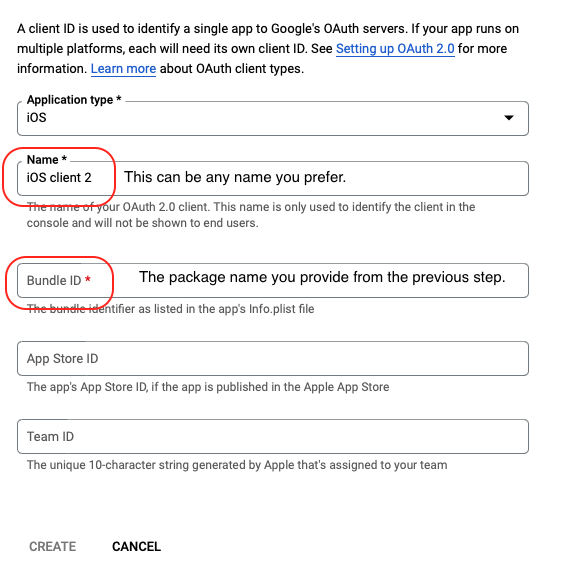
- Fill the required information.
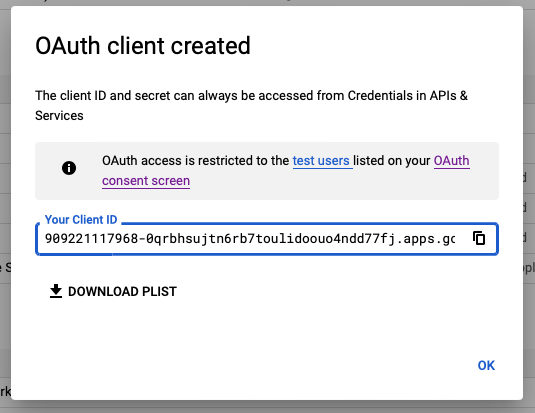
- After creating the iOS client, it will show you a popup. From here, copy the client ID and download the PLIST file.
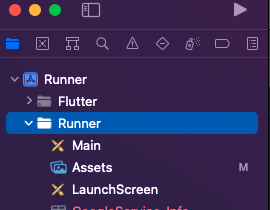
- Now you need to add this PLIST file into the iOS folder of the project. Firs we need to open the iOS section in the Xcode and open the Runner directory.
- Click on ‘Add Files to “Runner”
- Se
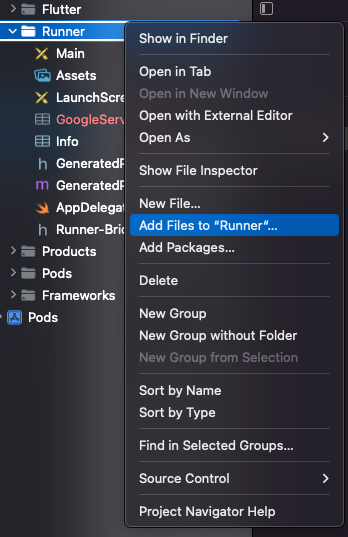
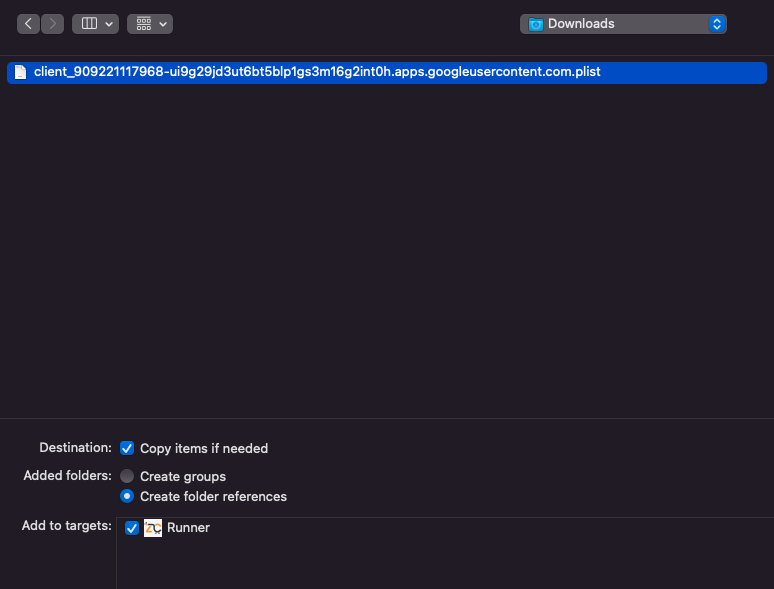
- Select the downloaded PLIST file and check “Copy items if needed” and Add to targets “Runner”. Then Click ADD to add this file in the Xcode. Close Xcode and open VS code or Android studio to see the file is in the iOS file or not.
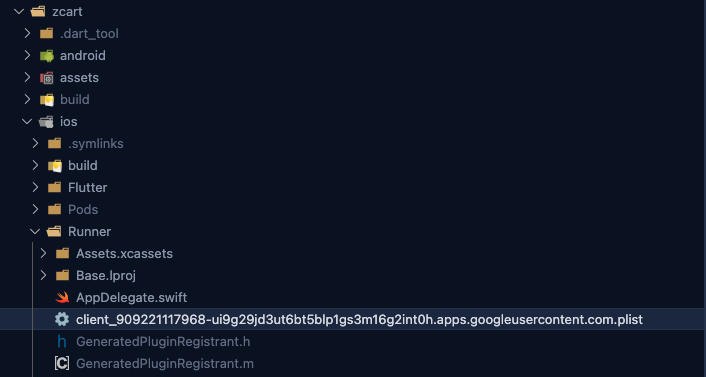
- Now you can see the PLIST file is added in the iOS folder.
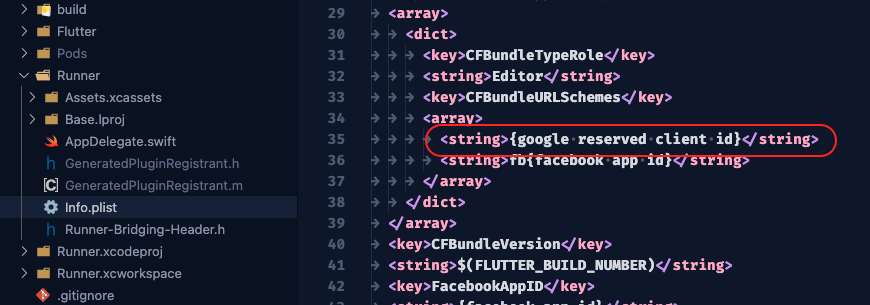
- Now you need to add the client ID you copied before in the info.plist file. So open info.plist file which is located in the same directory, ios/Runner/info.plist. Replace {google reserved client id} with your client ID.
Now you are good to go with google login in iOS.