Configure Facebook Messenger
A great way to communicate with customers to your website in recent times is to offer a live chat feature on your website. Configure Facebook messenger to offer your customers a way to directly contact you, it’s very important when selling online.
The process is simple and you can change the colors and introductory message to style the live chat box to suit your brand.
Get Your Facebook Messenger Configuration Code
You have to have a fan page for your business. If you don’t have a page yet, you can create a Business page easily from here.
Now follow these steps:
1. Click Settings in the top right of the page.
2. Select Advanced Messaging from the left-hand menu.
3. Scroll down to Whitelisted Domains and enter your website URL. This must include the https:// protocol. Example: https://incevio.com/
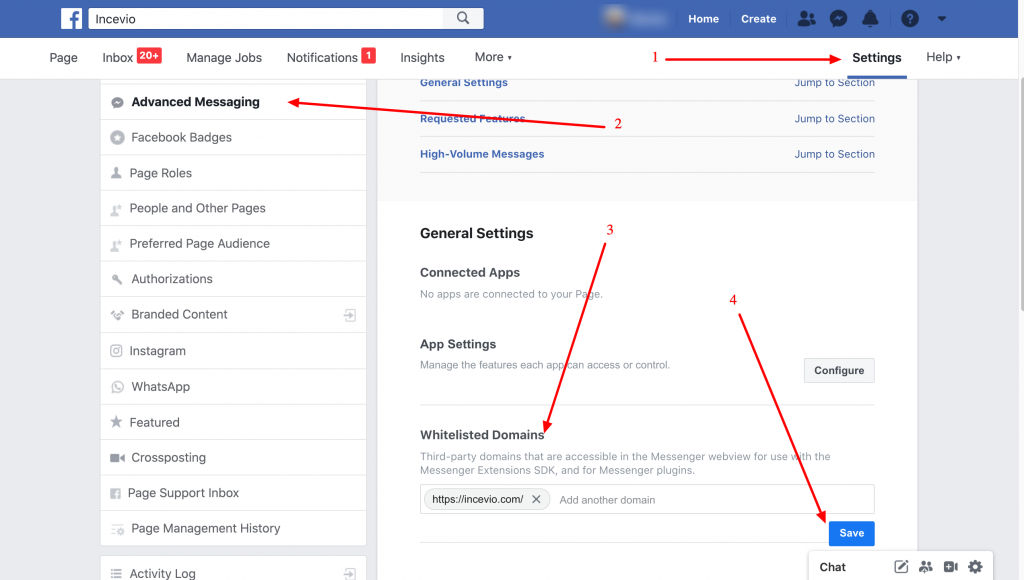
Facebook Messenger Configuration
4. Click Save
Now the second part of the configuration where we will get the configuration code.
5. Go to Messaging in the left-hand menu
6. Scroll down to Add Messenger to your website and click Get Started
7. Click Next and adjust the setup to your preferences.
8. In the last step add your website URL as you did previously(if it’s already not selected).
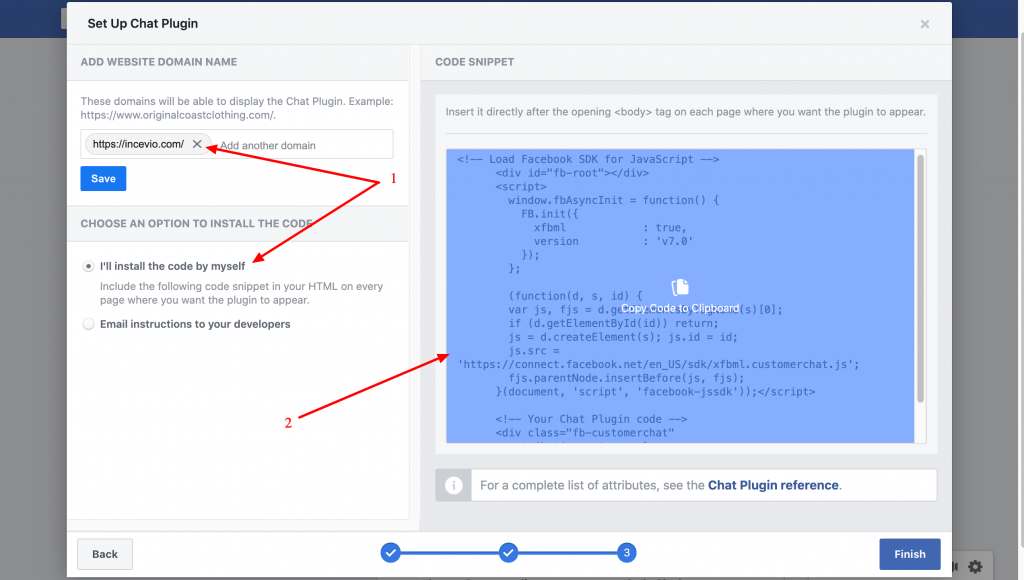
9. Copy the code on the right to your clipboard.
We’re done with Facebook and now time to configure your website.
Add Your Facebook Messenger Code To Your Website
1. Login as admin and go to the settings messenger
2. Paste your cofiguration code into the FILE CONTENT box and save
If everything went fine, the messenger should be visible on your site.