Google Analytics Configuration
The application has a basic visitor analytics system built in. But if you want to use Google Analytics then the application can get your Google Analytics data on your admin dashboard and report section in place of the built-in system. By configuring Google Analytics API you can see Page views, Sessions, Unique visits, Referrals, and Behaviors visitors on your marketplace admin dashboard. Before enabling Google Analytics you must configure the application correctly to get the Analytics data.
Installation:
The installation process is the same as other zCart Modules, please check this section for guidance.
Configuration:
Before enabling Google Analytics you must configure the application correctly to get the Analytics data.
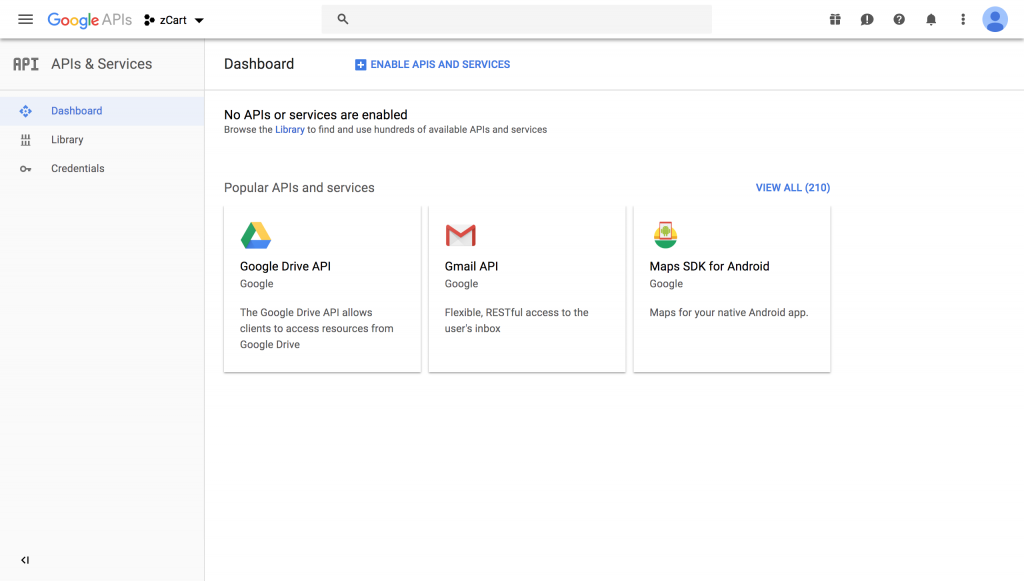
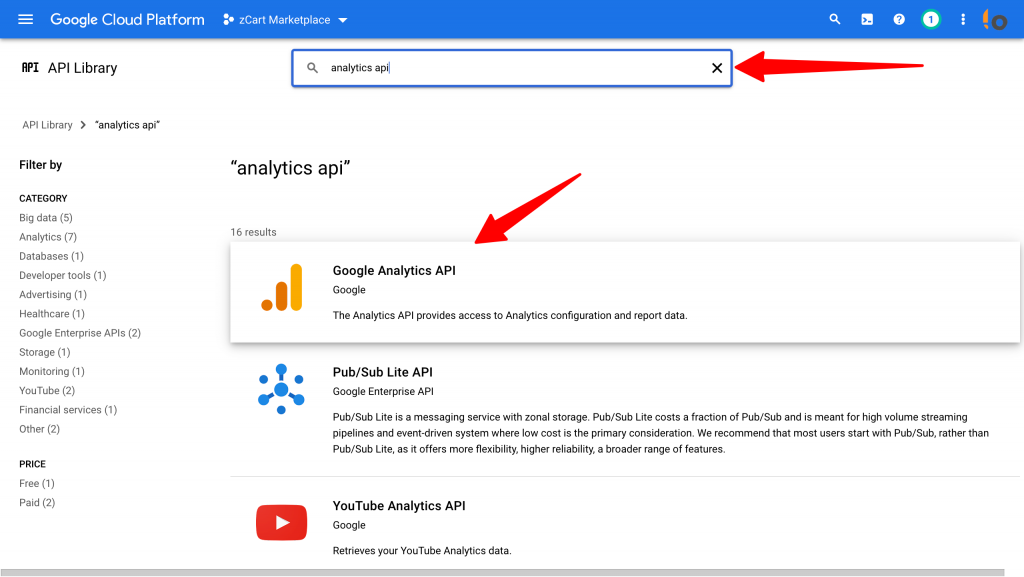
Next, Search for the Google Analytics API
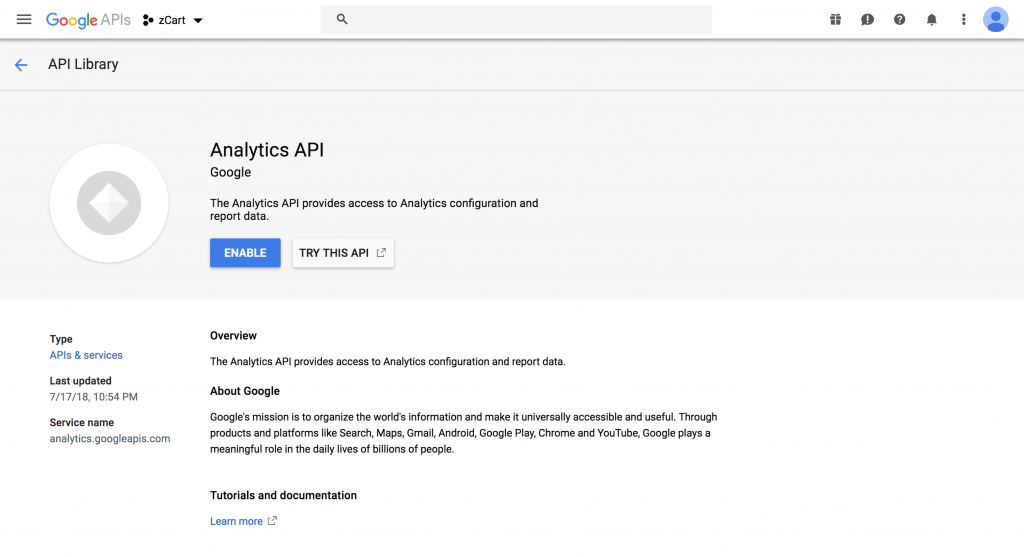
On the next screen click the ENABLE button.
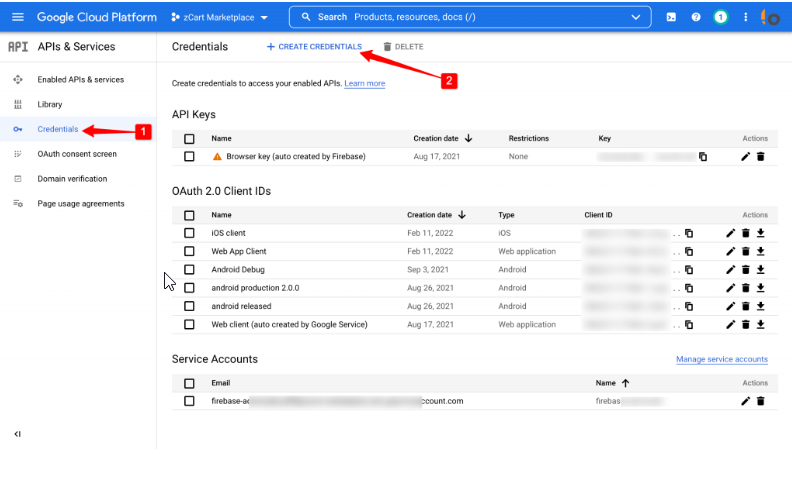
Now that you’ve created a project that has access to the Analytics API it’s time to download a file with these credentials. Click Credentials in the sidebar. Click Create credentials and choose Service account from the dropdown list.
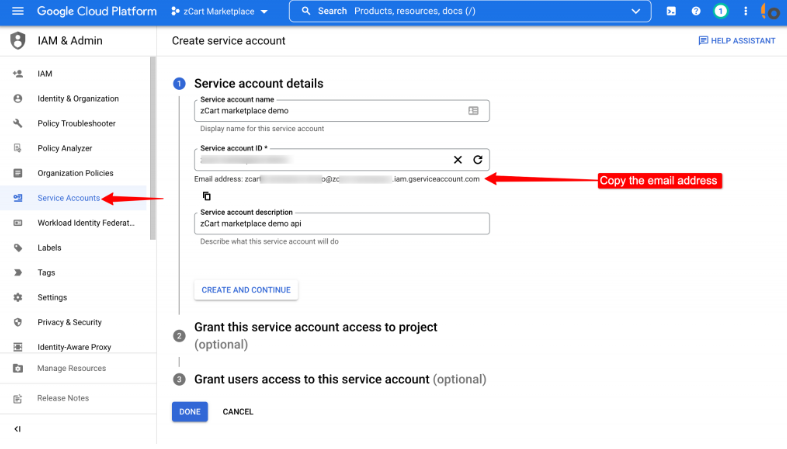
On the next screen click over the New service account field and give the service account a name on the Service account name field and on the Grand access section set the Role as Project Owner. You can name it anything you’d like. Copy the email address in the service account id, we’ll use this email address later on in this guide.
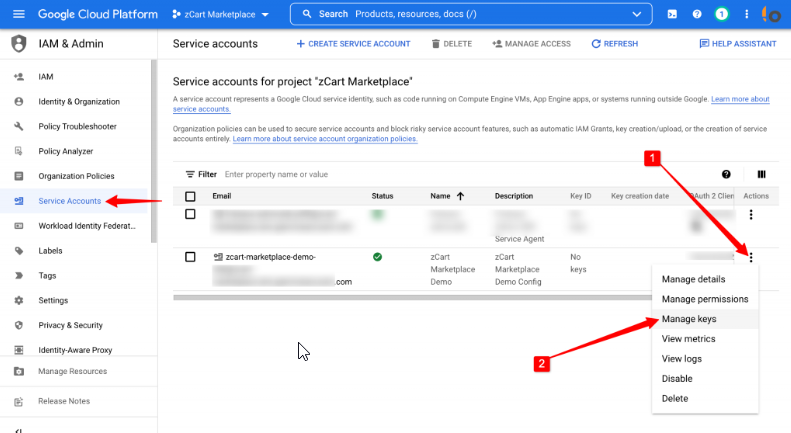
Get the service key
Now we need to create a private key for the project. From the options panel select Manage keys option.
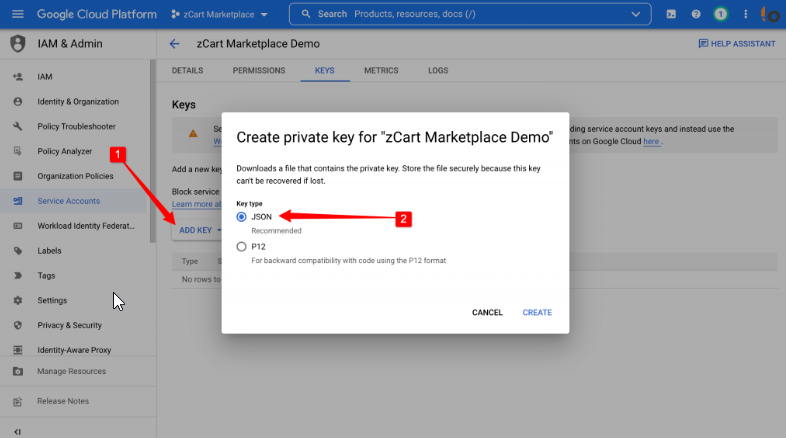
On the next page click on ADD KEY button and select Create new key. Select JSON as the key type and click the Create button.
A JSON file will be downloaded to your computer, we’ll use this file to connect with Google.
Now you have the API credentials on your local computer’s download location. Rename the file service-account-credentials.json and upload the file to your project in the storage/app/analytics/ directory. Create the analytics directory if not exist.
Grant permission and Get the View ID
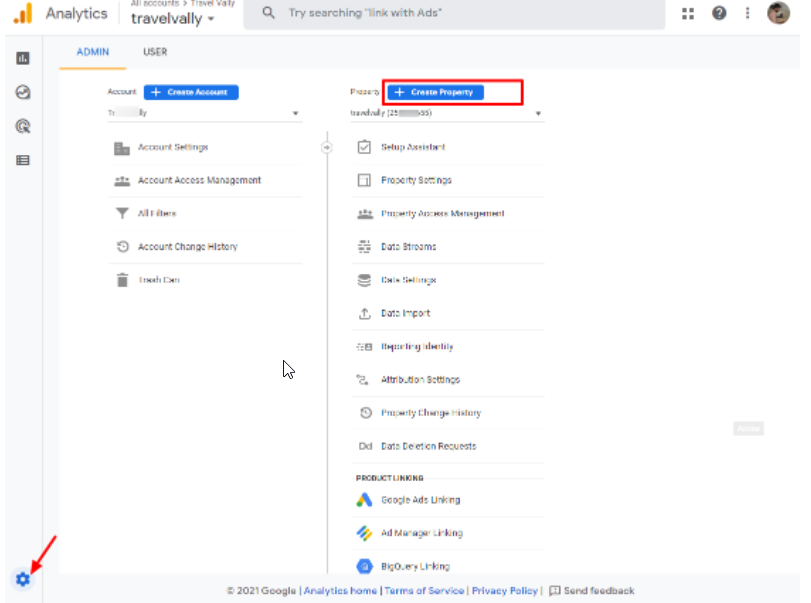
If you don’t have a Google Analytics account, create one from the Google Analytics site. Go to the Admin section from the sidebar and click Create Property option
Set the property name time zone and currency then click the show advance button.
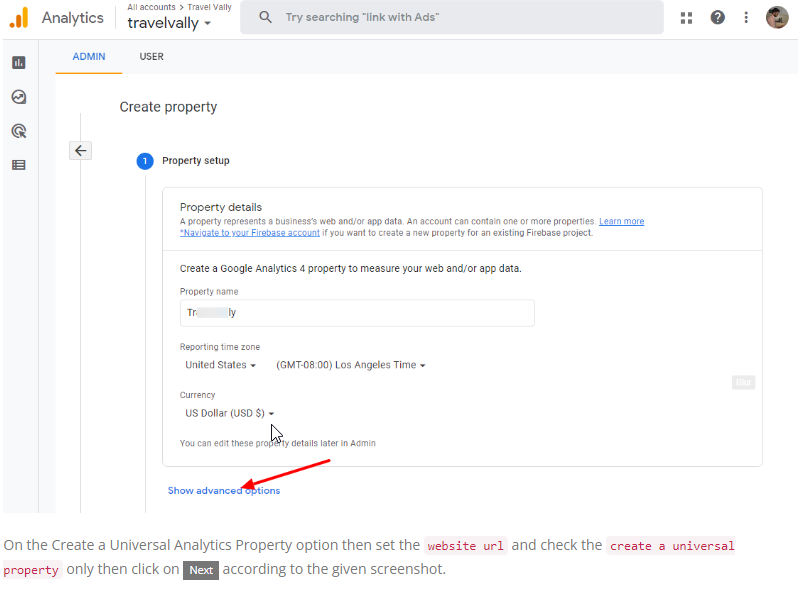
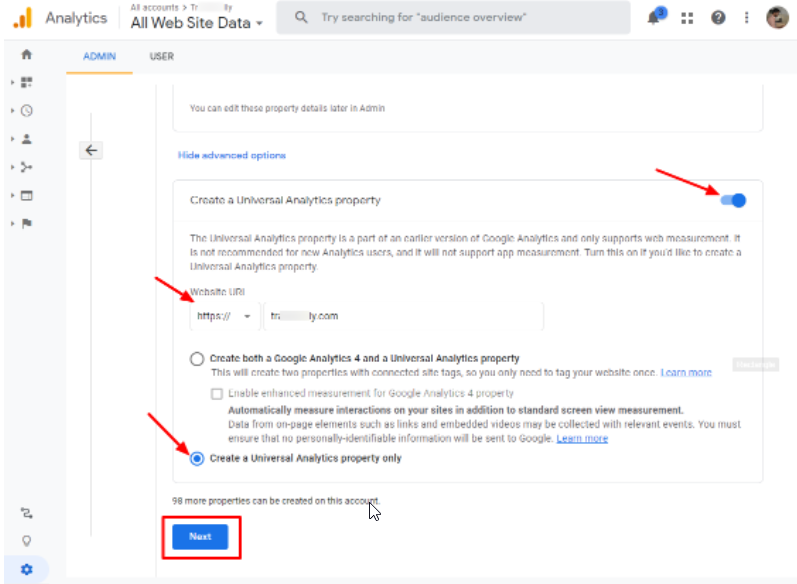
On the Create a Universal Analytics Property option then set the website url and check the create a universal property only then click on Next according to the given screenshot.
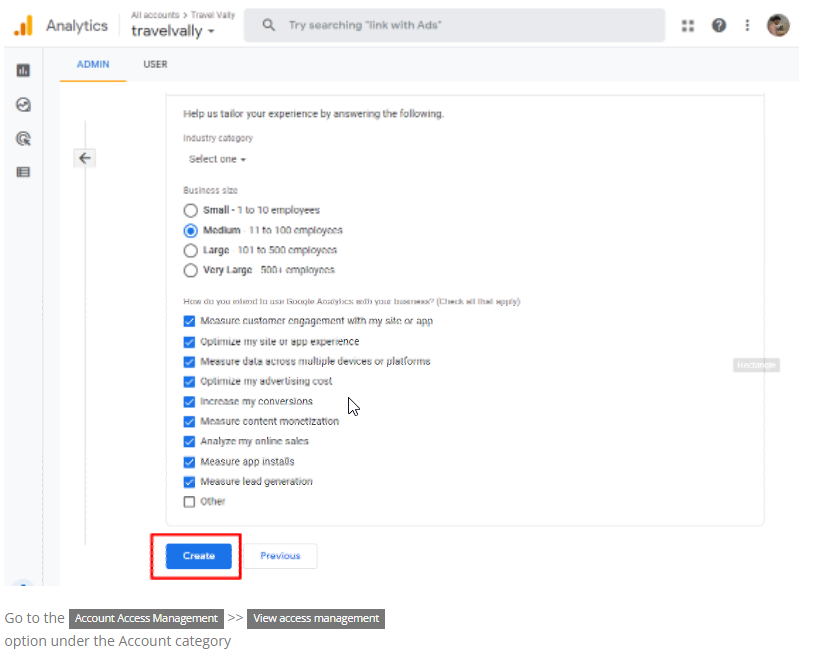
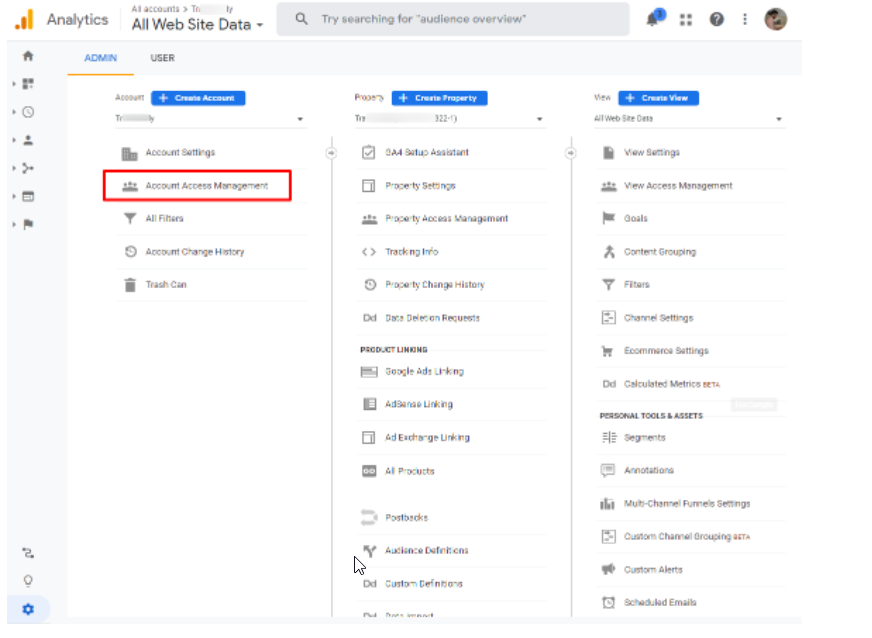
Go to the Account Access Management >> View access management option under the Account category
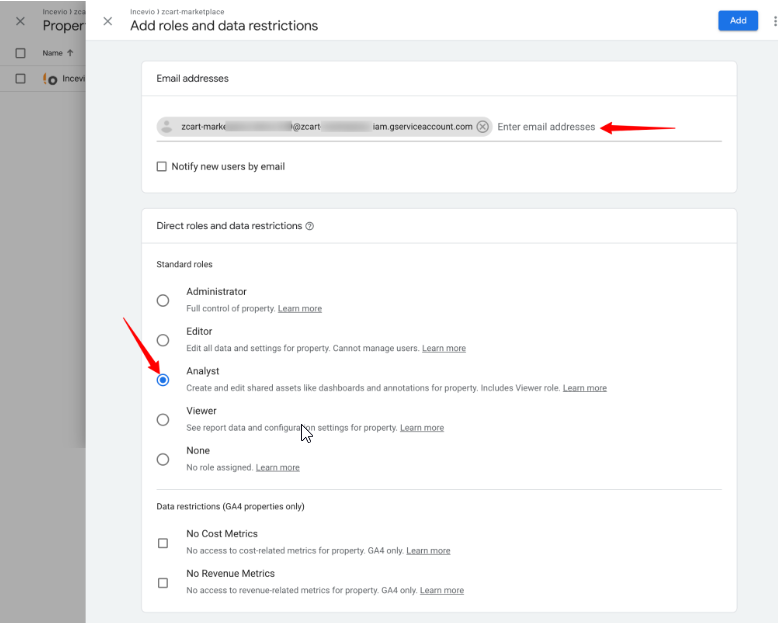
Now click the button and then select Add new users
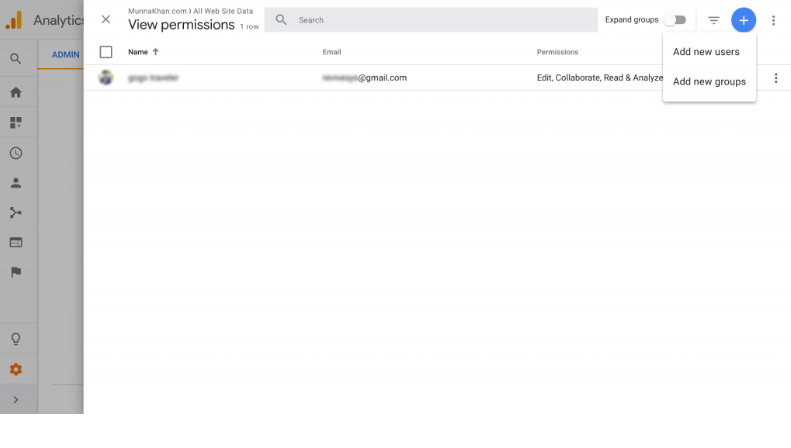
On the next screen in the Email addresses field paste the client_email the email address we got from the Google API site. Check the Read & Analyze and click Add to finish.
TIPS: If you forgot to copy the service account id email address, you can get it from the JSON file you downloaded in the previous step.
Go back to the Admin section again and click View Settings. We need the View ID displayed there.
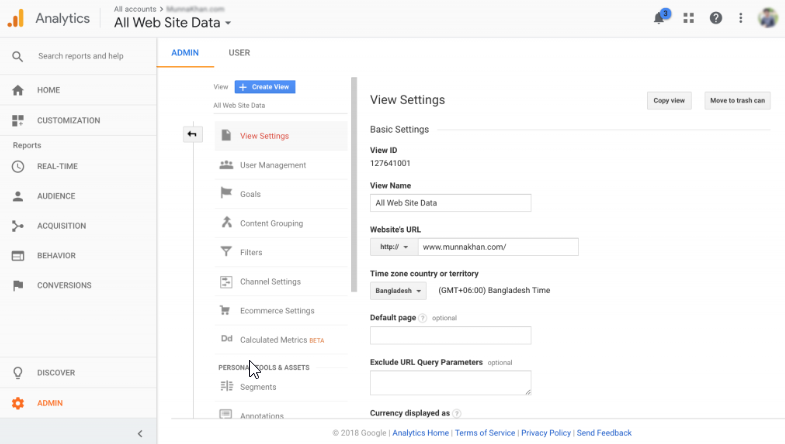
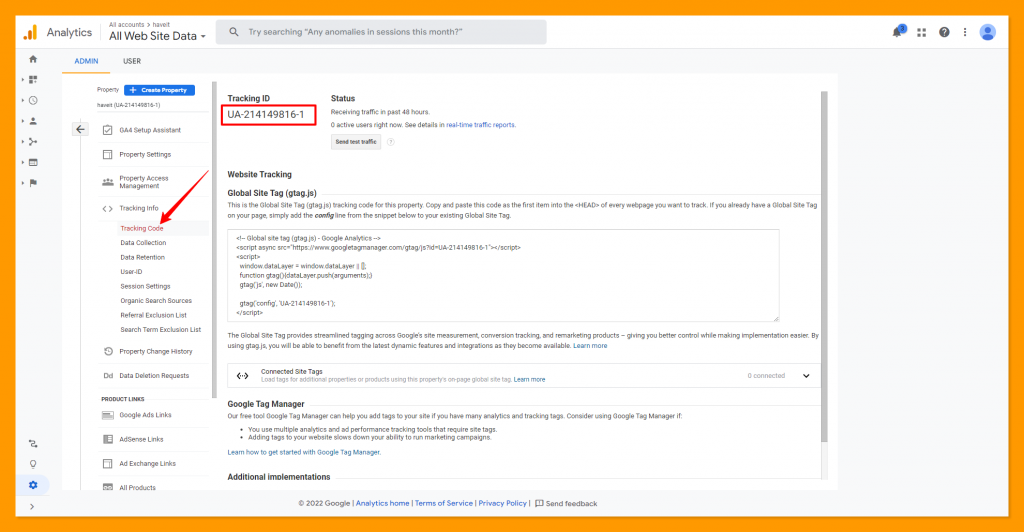
After that click on Tracking Code under Tracking Info. We need the Tracking ID displayed there.
Open the .env file and update ANALYTICS_VIEW_ID with the view ID and ANALYTICS_TRACKING_ID with the tracking ID, you got from Google.
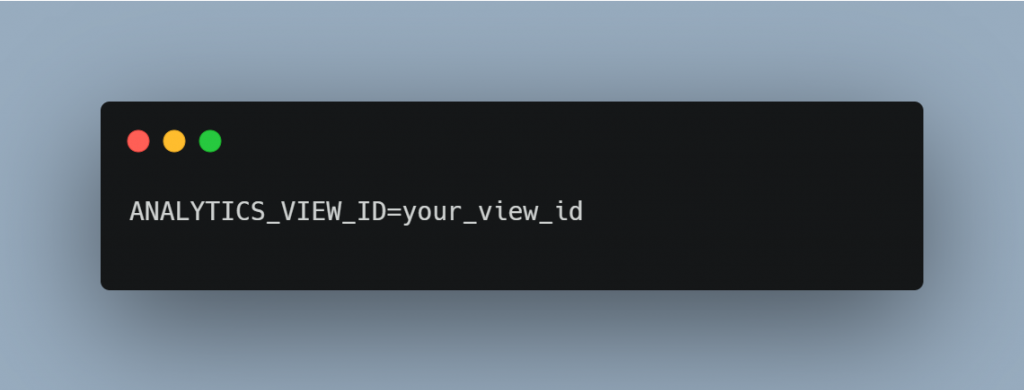
ANALYTICS_TRACKING_ID = your_tracking_id
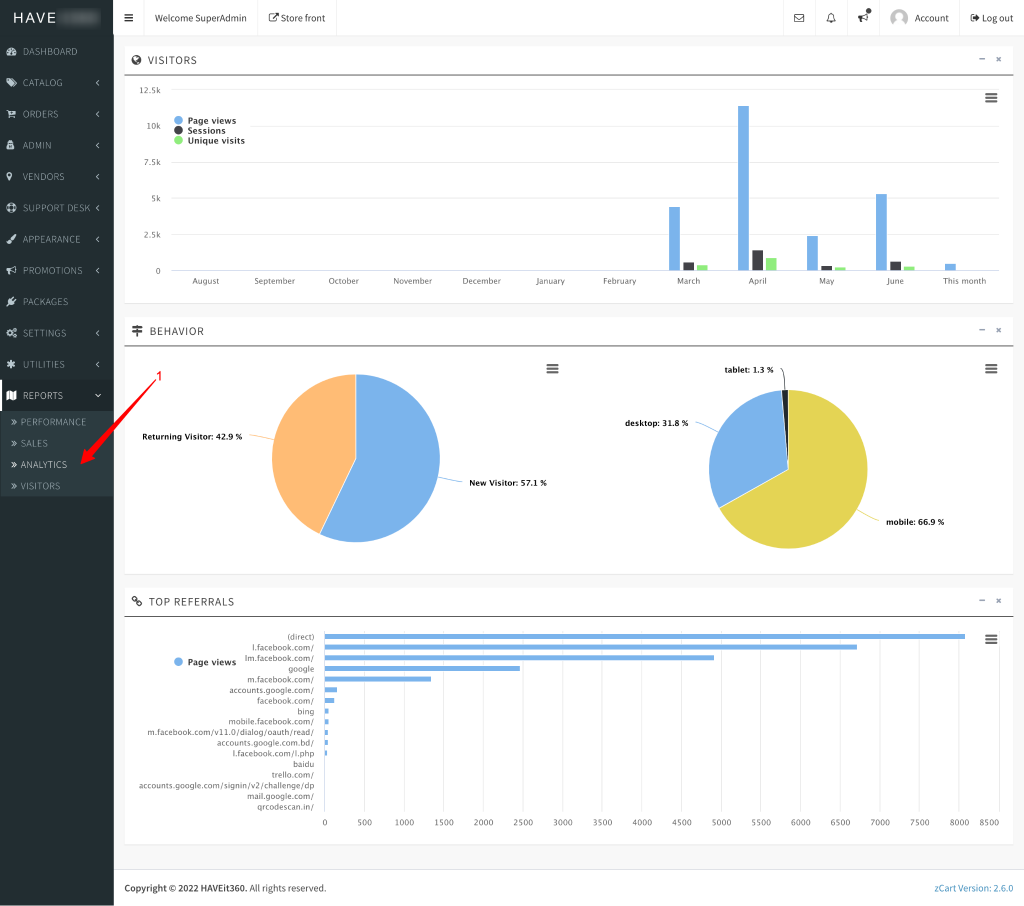
View Analytic Reports:
After the successful configuration admin user can have access to the Google Analytic reports directly on zCart report section.
REPORTS >> ANALYTICS