How to go live with a shop
This documentation will help you with how you can go live with your shop.
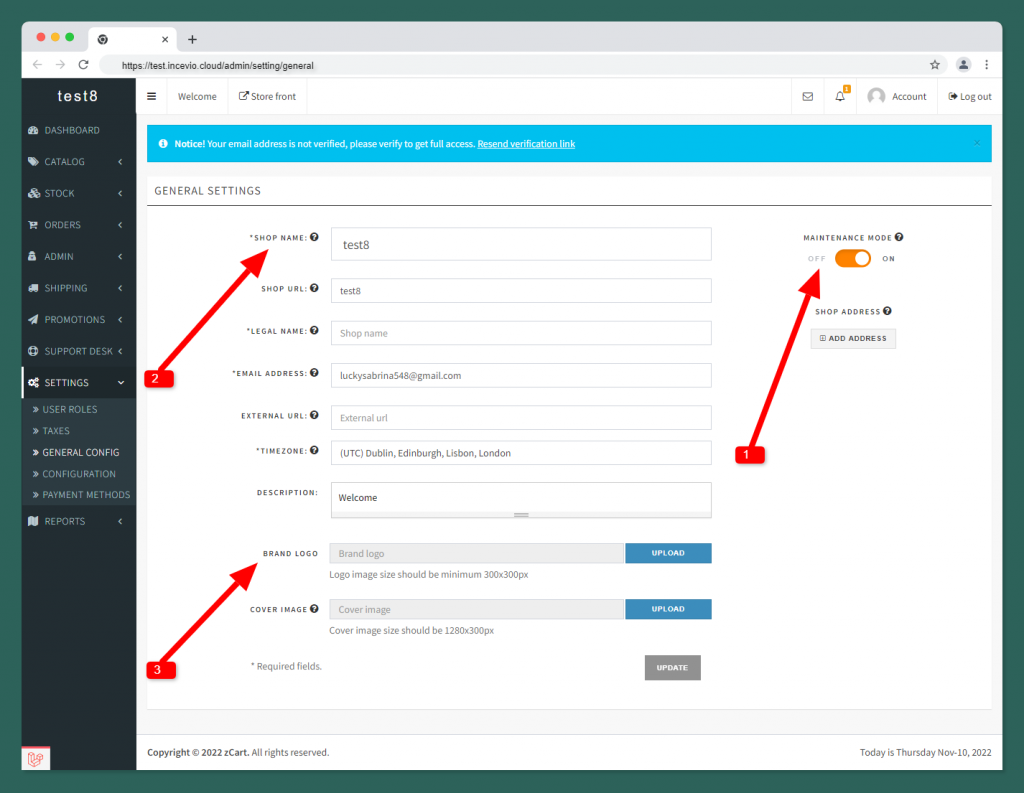
Step 1: The very first thing you need to do is turn off the maintenance mode and set your shop name, logo, cover image, address, etc.
SETTINGS GENERAL CONFIG
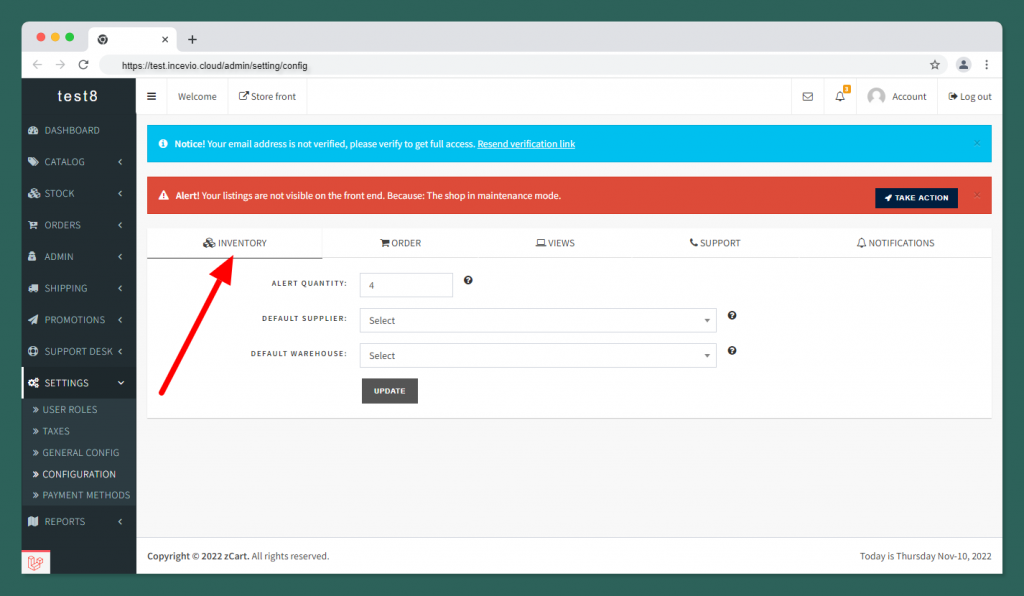
Step 2: You can set the Inventory stock alert quantity, default Supplier, and default warehouse.
SETTINGS CONFIGURATION INVENTORY
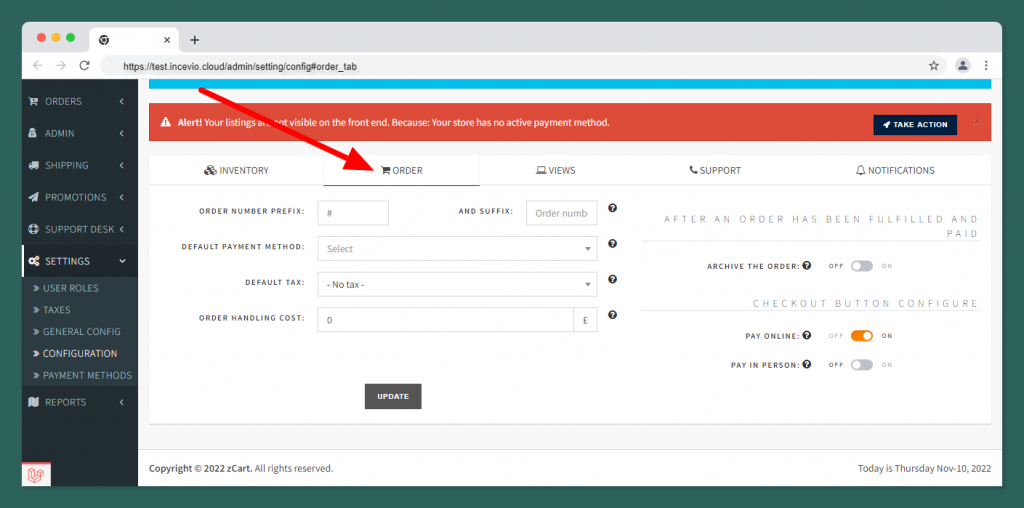
Step 3: You can set the order number prefix and suffix as per your need. You can set the default payment method, for a new order this payment method will be pre-selected.
SETTINGS CONFIGURATION ORDER
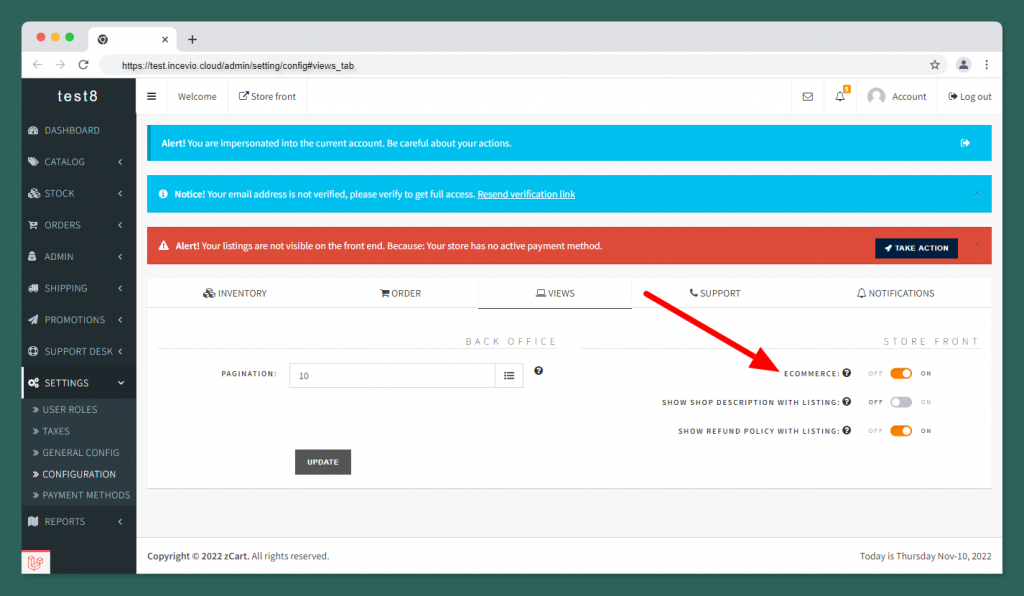
Step 4: This is the most important part before going live with a shop. Please turn on the “ECommerce” button without turning on it your shop will not show in the marketplace.
SETTINGS CONFIGURATION VIEWS
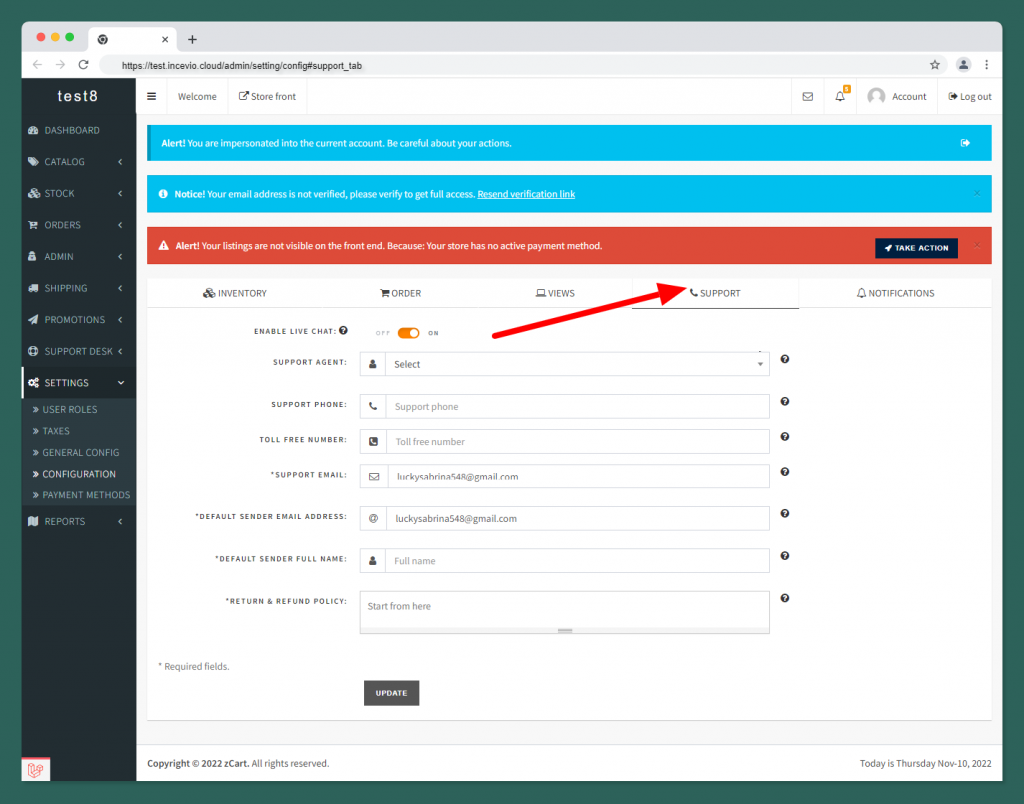
Step 5: You can enable/disable the live chat option for your shoppers from here. Also, you can set the support email, phone number, etc for your customers here.
SETTINGS CONFIGURATION SUPPORT
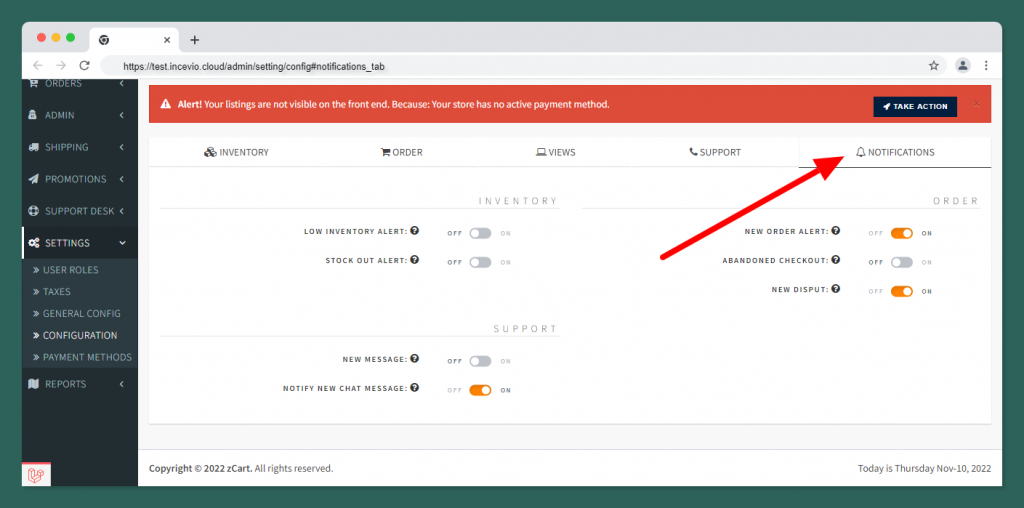
Step 6: In this section, you can turn on the notifications for your shop, those you want to get notified.
SETTINGS CONFIGURATION NOTIFICATIONS
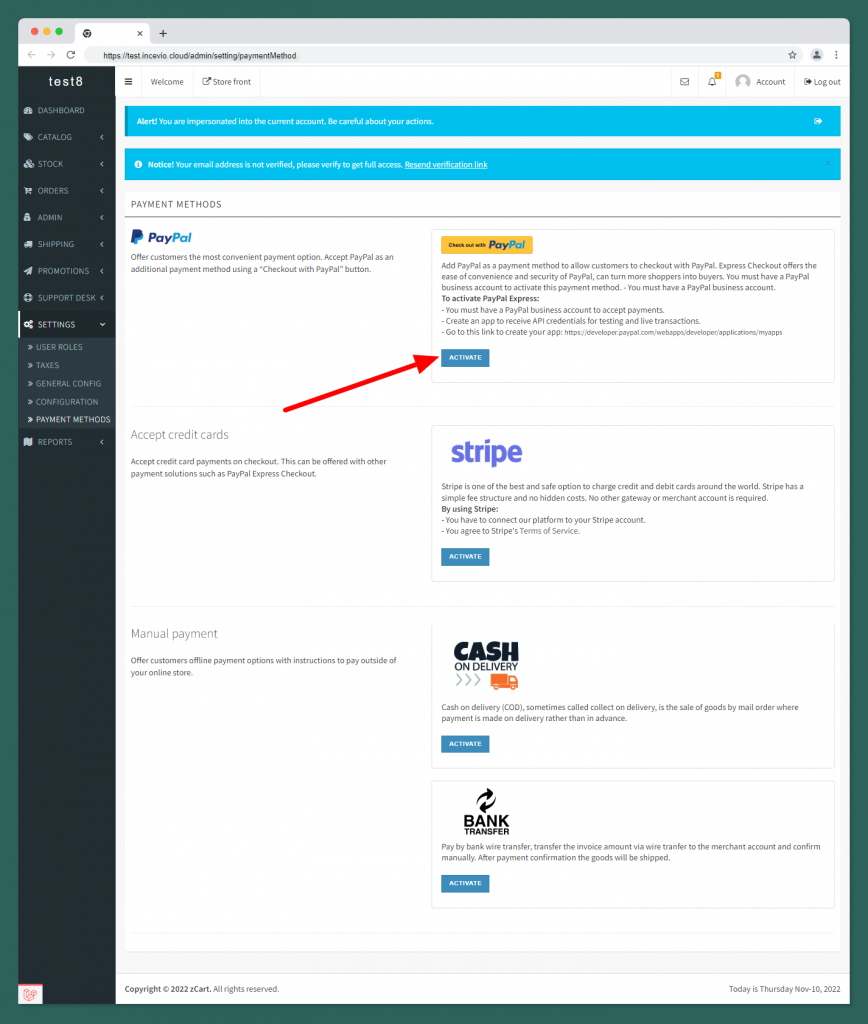
Step 7: This is also an important part to configure the payment method for your shop. Without configuring at least one payment method marketplace won’t allow you to go live with your shop.
SETTINGS PAYMENT METHODS
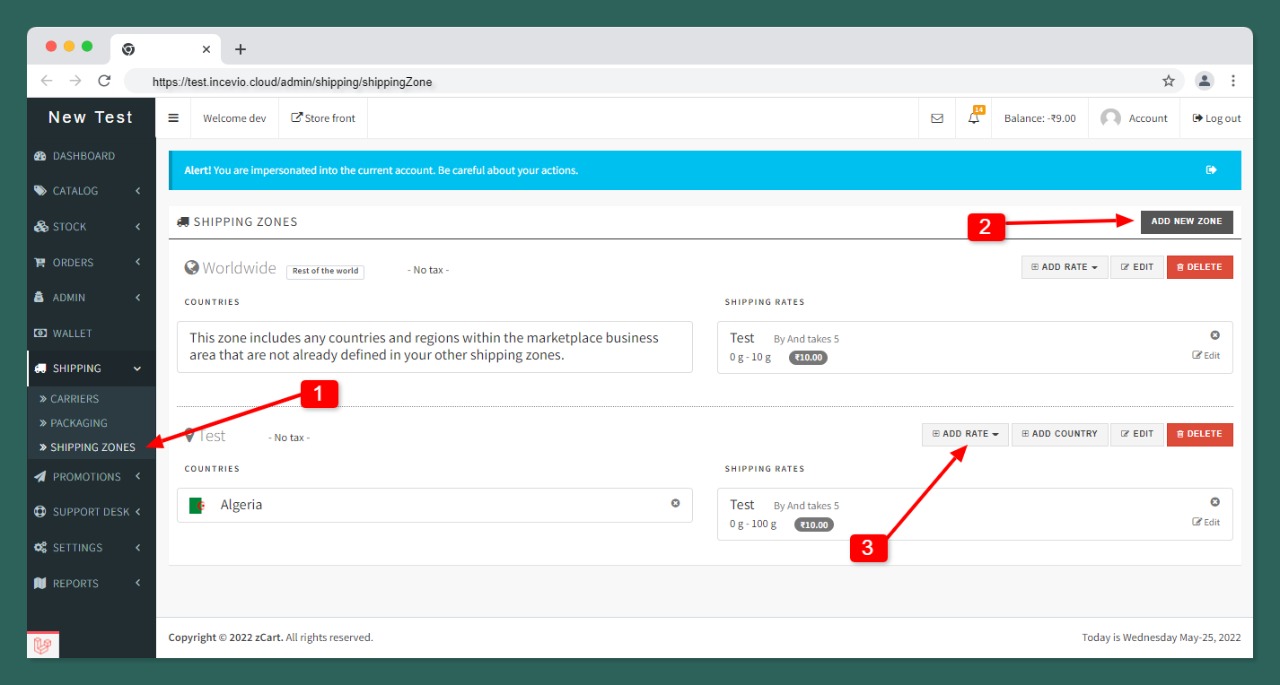
Step 8: Shipping Zone
A vendor also needs to set the Shipping zone. To create a shipping zone, the vendor needs to set the shipping area and shipping Rate based on price or based on weight.
MERCHANT DASHBOARD SHIPPING SHIPPING ZONES
Step 9: Product Listing
The default catalog system allows vendors to create listings using any product on the catalog system, even if the product was created by another vendor. When a vendor adds products to the zCart catalog other vendors will be able to list the product in their inventories.
MERCHANT DASHBOARD STOCK INVENTORIES
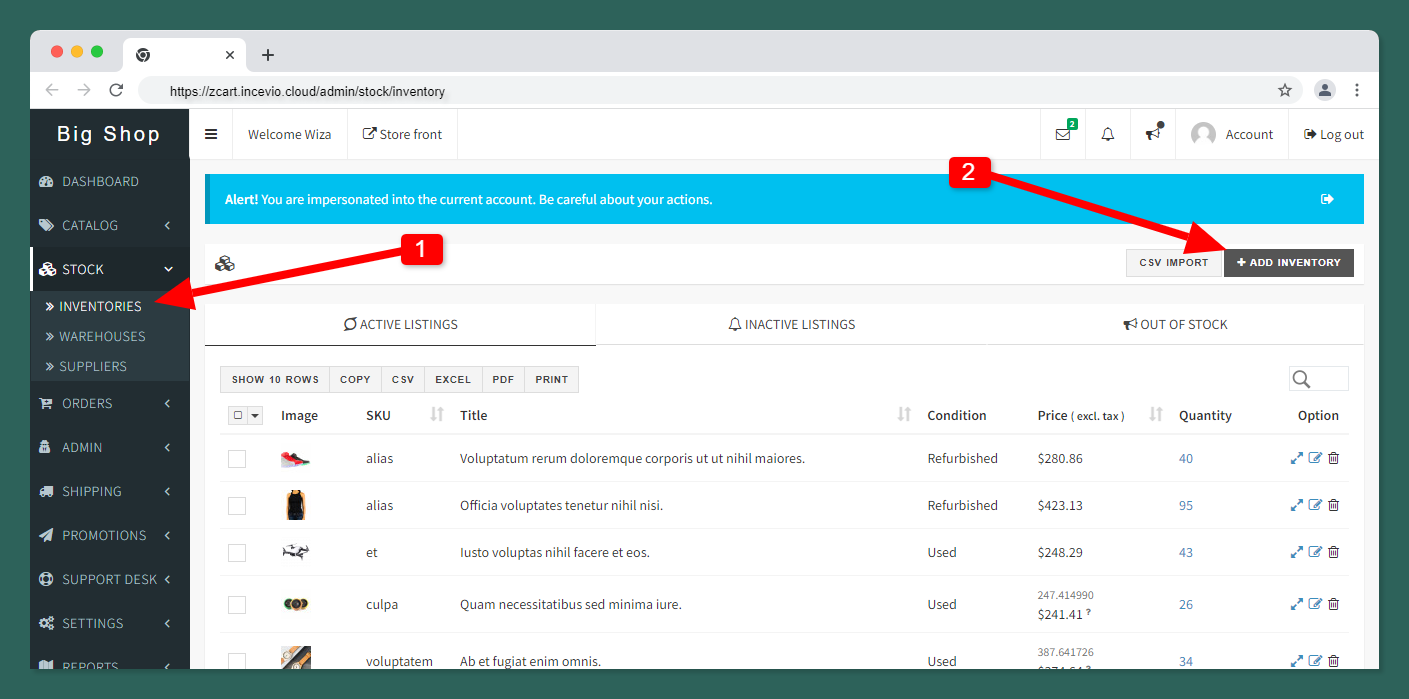
Now shoppers will be able to see your product on the frontend marketplace and also able to purchase these.