Invoice and Shipping Label Templates >= V-2.17.0
Starting from 2.17 zCart will be using PHP file based templates(blade templates files) for generating invoices. This means you can laravel’s blade files to customize your own platforms invoices for customers. This allows using html, css ,php and blade directives for creating or modifying your own unique invoice template.
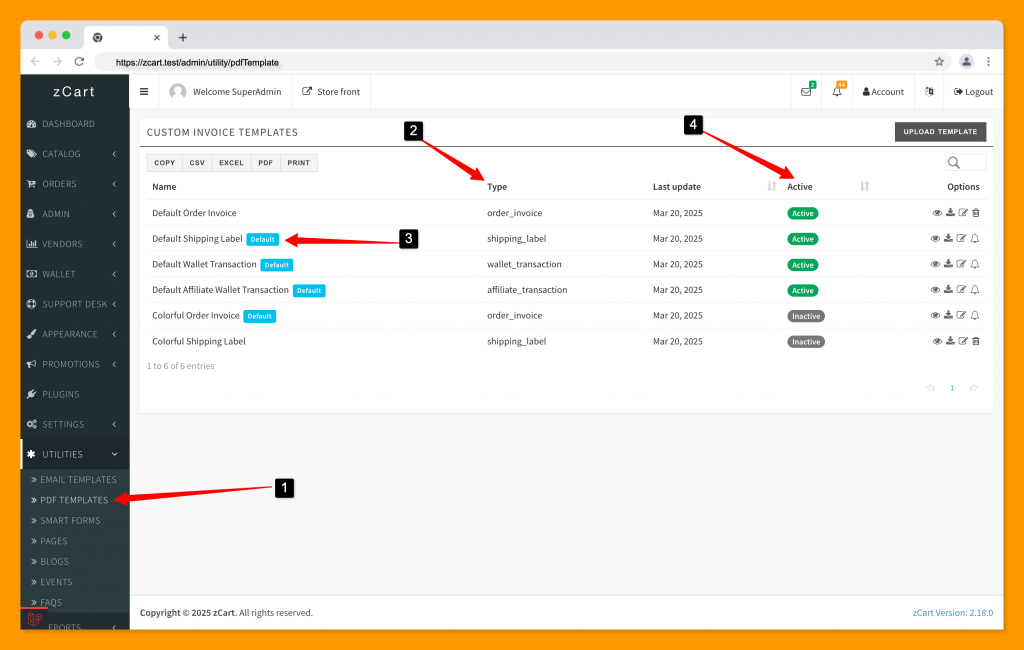
To find the current template go to the public/pdf_templates directory. Inside the directory there will be a file named default_order_invoice.blade.php. This file is used as a template for generating the invoice. All data is passed inside the blade file in the $data variable.
Create Your Custom Template
You can customize the invoice by making changes in the default_order_invoice.blade.php file and customize the shipping label by making changes in the default_shipping_label.blade.php file. To create a template or modify existing one, you’ll need basic knowledge of PHP, HTML, CSS, and Blade templating syntax. Without these skills, you risk disrupting the template entirely, which could potentially break the whole website. Always ensure you understand the changes you’re making before proceeding.
To create a new template, we recommend using an existing and working template to make changes, and then upload. For example by changing the css styling in the <style> </style> tag in header section. Here you can change the color of table, text or by commenting or removing the <img/> tags you can remove the image of shops in the invoice.
Follow the below basic guidelines for any modifications:
- Always keep a copy of the default template before making changes.
- Fonts used need to have utf-8 support otherwise wont support multilingual translation.
- Templates don’t support flexbox or grid.
- Use inline style tag or style div for making changes to the css. Linking external css libraries through css can cause errors in some cases.
Editing An Existing Template
For simple modifications, you can edit the .blade.php file much like an HTML file. Take the order invoice as an example.
Suppose you want to remove the payment status from the default order invoice. You can either delete or comment out the line that displays it. For instance, in default_order_invoice.blade.php, find the payment status code and just remove or comment out that line to exclude it.
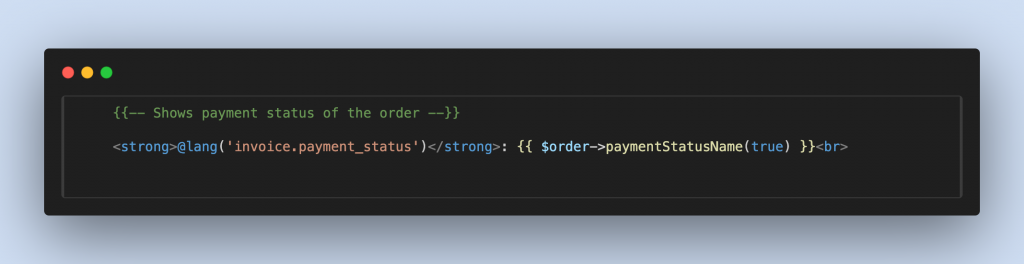
By removing this line or making the line a code comment, the payment status will be removed from the order invoice.
Rules for Uploading Templates
To ensure your template works seamlessly, follow these specifications. For minor adjustments, we recommend downloading the default template and editing it as needed.
For significant modifications, adhere to the following guidelines:
- The uploaded file must be a Blade template with a .blade.php extension (e.g., new_template.blade.php).
- All CSS must be embedded within the Blade template itself.
- Templates can only include Blade directives, HTML, and CSS. No other code/language types are supported.
A custom templates may cause errors in invoice generation if they’re not properly modified or contain mistakes.
It’s best to Contact the Incevio team for specific large changes. As we know our code best.
Vendor:: Choosing a Custom Template
Vendors can now select from available templates for their shops. To choose a different template, go to the merchant dashboard, navigate to Settings > Configurations, and then click the Order tab to make your selection.

Invoice labels will be generated from the newly selected template afterwards.